Thursday, February 27, 2014

The Raspberry Darling Suit - I finally picked a name!

Thanks to Lucy Topp for suggesting this name over on my facebook page.  I could just hear some very posh person saying it, drawing out the darling so it sounded like 'ddhhhaaaaaaaaaarrrlling'.  So it stuck!

When I finished talking about this suit last time, I had made a muslin of half of the jacket and turned it into a paper pattern.  The half a jacket looked like this:

Gotta love making up a muslin with scraps lying around the floor!
I actually had a guest around to my house later the next day who thought this was my actual finished product... err no.

So now that I had a pattern I was confident in, I set about cutting all the pieces I needed out of my expensive wool blend fabric, and carefully started the construction.

The first real decision I had to make came in regards to interfacing.  I just want to point out that I'm not using the instructions provided in the pattern, instead I'm using my intuition on how things go together, and my copy of Vintage Couture Tailoring by Thomas von Nordheim (which you can buy here for not much money).

In the book, Mr von Nordheim discusses the different types of fabrics used to interface, strengthen, and give shape to tailored suit jackets.  He talks about the different types of hair canvas used in really tailored garments, but also says that silk organza is used a lot in ladies tailoring, as it gives strength but also maintains the flow of the fashion fabric.

(I am going to do a review of this book, but I wanted to use it to construct this jacket first before I gave you a full run down with lots of pictures!)

With the way this jacket is pleated at the front I didn't think that the super tailored look would work, so that meant that hair canvas was out.  Luckily I had some grey silk organza in my stash, so I pulled that out to use as interfacing.

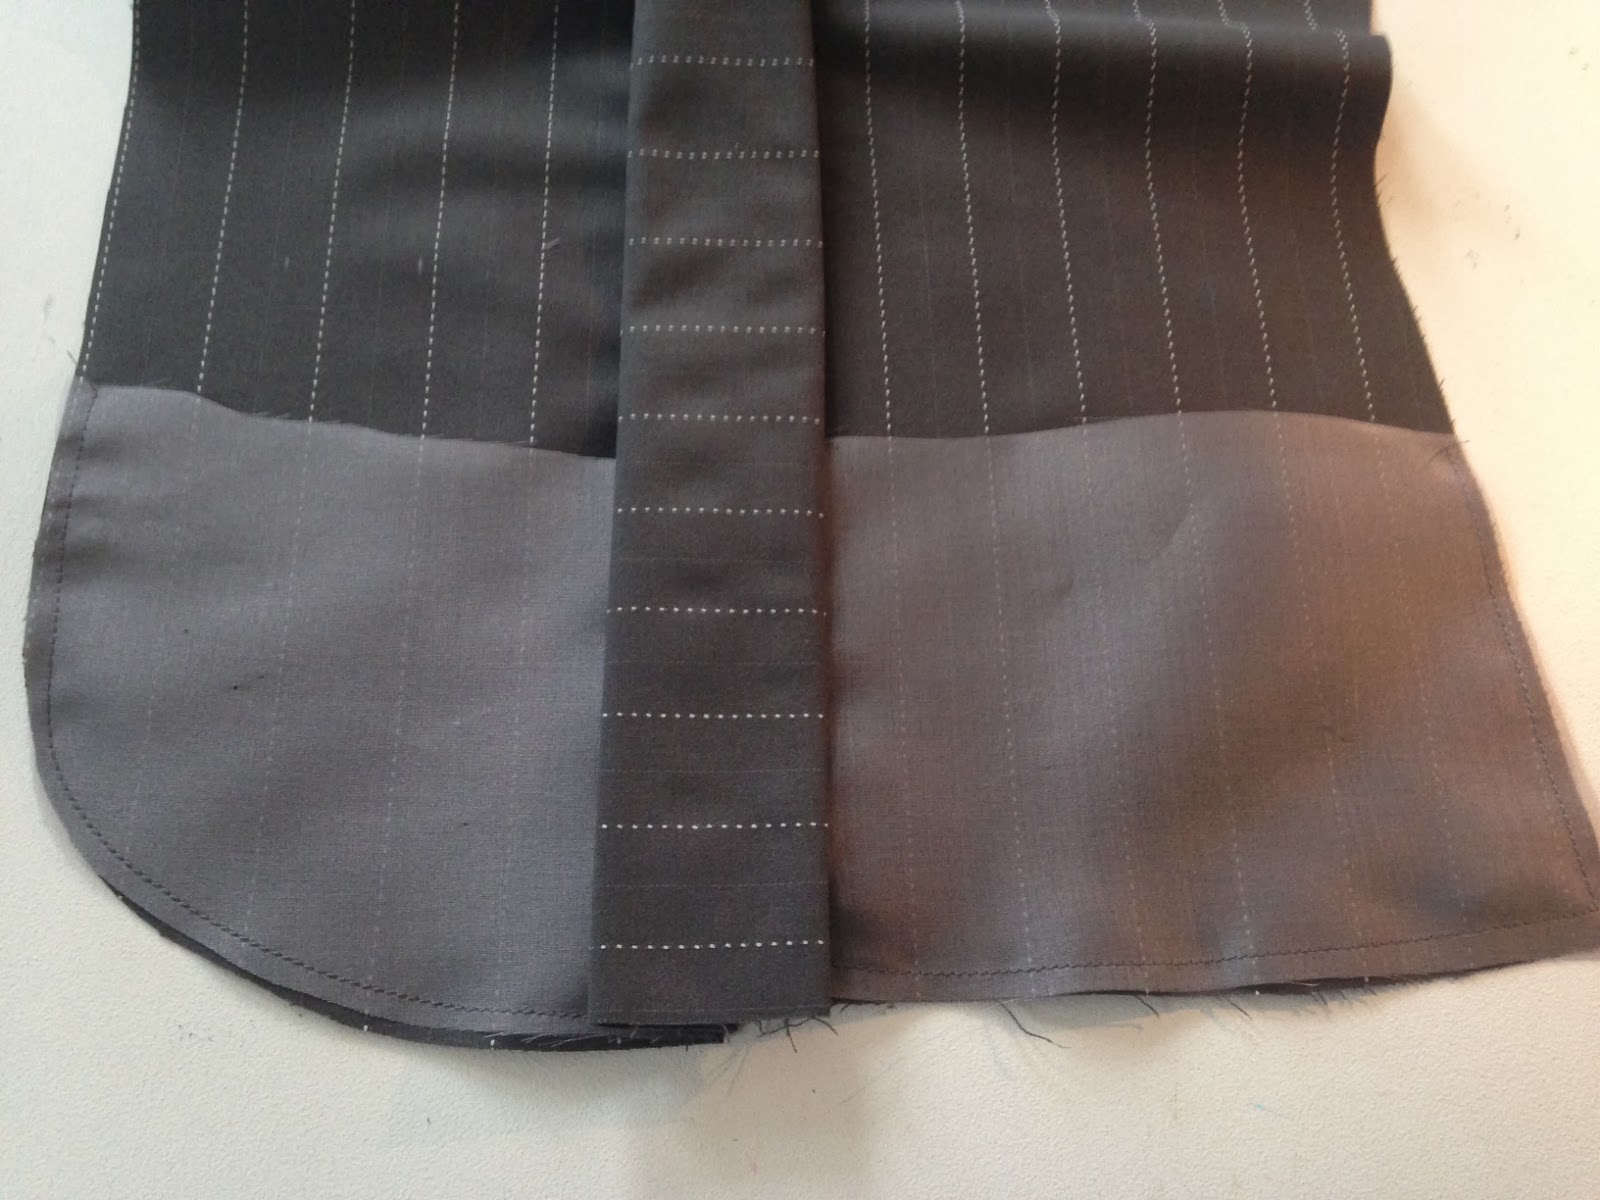
The book recommends interfacing the shoulder/upper chest section of the jacket fronts, and the lower edge of the jacket on the fronts and the back to prevent unwanted stretching of the fabric.  Now this is where my brain started tying itself in knots because my fabric is designed to have a bit of stretch...  I decided to interface the bottom of the jacket, and the portion of the front that is part of the collar.


Because my fronts have a big ol'pleat in the middle, I just interfaced either side of the pleat (note that the stitching line near where my fingers are holding the pleat back is in the seam allowance only, and doesn't go through to the front of the jacket).  In the book Mr van Nordheim gets you to hand do all this outside the seam allowance cause its a book on couture tailoring... but the weave on this fabric is so tight that every little stitch would be seen... so I just machined it within the seam allowance.  Its not like its hair canvas, right?

Yes I promise to do it properly when I use 100% wool fabric and hair canvas...


Then I remembered about the bound buttonholes!

Luckily these don't frighten me anymore - I've done so many of them!  So I did the three that I needed to do, using the organza again to support them.  Then I moved onto the front facings.  I did the buttonhole windows in them and interfaced both with organza.


Then I sewed the facings to the jacket front pieces.


I did a lot of seam allowance grading and notching so it didn't look all fat and nasty when I turned it through.  Then I sewed the fronts to the back and actually felt like I had gotten somewhere!!!


Please excuse the pins.  I also ran satin bias around the hem of the jacket and pinned up the seam allowance... and the pins around the button holes will be removed when I've done a little bit of hand sewing to attach the windows in the back to the buttonholes at the front.

All in all though, I felt it was a really solid days work!  Thank you for wading through the boring pictures and technical discussion!  Hopefully the next post on this jacked will be more exciting because it will involve the gorgeous raspberry satin lining!!!

Beccie
xxx

Tuesday, February 25, 2014

A Vintage Dressmakers Box

On New Year's Eve, I was lying in bed (at 10pm.... I know!) catching up on reading my favourite blogs, and I saw this post written by Laura at Lilacs and Lace.

And I was spellbound.

And feeling kinda sad because it was New Year's Eve and I was at home in bed feeling rotten.

So I bought it.....


It seems that this box of goodies was purchased on the 15th of November 1956 from Mandel Brothers in Chicago.  I know it was purchased then because the original dated receipt was in the box.


And then she put it away and never did anything with it.  I was drawn to this box for obvious reasons.  Not only is it a preserved moment in time, which always appeals to me, but the lady intended to make a LILAC SUIT!!!!

I wish there was a way to find out who she was...  there isn't...  so I've decided to call her Martha.

From the quantities of fabric Martha purchased I think she intended to make the McCalls suit, but because she bought both patterns, there is a chance she intended to do what I'm going to do.

The Vogue pattern is a dress and jacket.  I looooove that jacket!  So I'm going to make it, and the skirt from the McCalls pattern!  I would make the Vogue pattern in its entirety, but I don't think there is enough wool.

I want to do this as a tribute to Martha who couldn't finish this project for whatever reason.


As well as the gorgeous lilac wool fabric, and the patterns, Martha also purchased a zipper, rayon seam binding and thread!  And I intend on using it all in my suit!

I really wish I could find out who she was...

The only part of this box that I won't be using is the fabric Martha purchased for the lining.


She purchased some of that god-awful acetate (the fabric on the right).  Its stiff and I can already feel it sticking to me because it won't breathe.  Ugh!  But it just so happens that I had already purchased some rayon lining (the fabric on the left) which is a pretty good match all things considered!  It will breathe and will be much nicer to touch.

This will be my next project after the Raspberry Darling suit is finished!  I'm so excited to see Martha's dreams complete.

Beccie
xxx

Friday, February 21, 2014

WINNER ANNOUNCED! Valentines Day Giveaway

Before I get things rolling I just want to say how blown away I was by the response to this giveaway.  I had 49 entries - 49 of you put aside your issues and focused on what you love about yourselves, even if it was just for that short time that it took to write a comment.  Thank you.  I hope that in doing this little thing you got one step closer to loving yourself for who you are.

So now for the fun bit!

The first step in drawing these giveaways is to get the equipment ready.  I dug out the numbered ping pong balls and counted them into the usual bucket.


Then I checked with Miss Stella to see if she was ready.

She was - can you tell?

Then I threw all the balls on the grass and waited the very short time it took for her to choose her winner.


She chose number 36.

No you can't have it!!!


And that number belonged to:

LIZZARDTEARS!!!

Congratulations honey!  Please send me an email at sewretrorose(at)gmail.com and if you get it to me fast enough I can get your goodies in the mail to you today!

I'm sorry that I couldn't give a prize to all of you, because you all deserve one.  Thank you again for making this so successful.  Keep loving yourselves, and I promise I will too.

Beccie
xxx

Wednesday, February 19, 2014

The Something Suit - It Begins...

Obviously I'm having trouble coming up with a name for this suit... anyone got any ideas???

This suit is the first of many suits I hope to make this year.  And you know me, I don't want to start with something easy!

I decided to recreate this suit:

This suit is for sale on Etsy at FabGabs Vintage.  You can see the listing here, and it is being modeled by the divine Solanah who blogs here.

I was thinking I was going to have to buy a pattern and then modify it to have the features of the suit... and then I found this: 


I was gobsmacked!  I hit the Add To Cart and Purchase buttons so fast  it was a blur!  There is another one for sale here if anyone is interested!  Anyway, I didn't really care that it wasn't going to fit me straight off the pattern...

Last thing to hunt down was the fabric.  I can't seem to find a decent place to buy wool suiting in Australia, so I went to my go-to website for wool fabrics (and other amazing things) - Gorgeous Fabrics.  It seems that grey pinstriped wool isn't very popular at the moment, and I had a choice of one.  Its a blend of wool, rayon and a bit of lycra, so its got stretch.  While I would have LIKED something a bit thicker with no stretch, I bought it anyway, and I'm glad I did.  Its got a lovely hand and drape so its perfect for this pattern.

The really fun bit was picking the accent fabric, and the lining fabric!


The top fabric is the lining fabric, a delicious raspberry pink satin.  The middle fabric is a scrumptious slightly darker raspberry pink velveteen which I will use for the bows and the buttons.  The bottom fabric is my charcoal grey suiting.

YUMMY!!!

The first job with the pattern was to do a muslin to see how bad the fit was.  This is how bad.

The back is ok-ish!

err... the front is not...

So I did some measurements and cut out another one...while I was at it I added 1.5" to the side of the back bodice:

Much better!

I was happy with the fit of this one, so I attacked it with a texta to mark out the princess line piece with the stripes going the other way.  Then I cut the pieces to make new pattern pieces.


Then to test the theory, I cut the pieces out of more scrap pieces of fabric and sewed them back together.

(Is this sounding like a bit of a process?  Cause it was...)


Hooray!!!  But have you noticed the oopsie that I did on the first muslin?  There was a fold line on the perforated pattern that had me fold a couple of inches over all the way up the inside edge... this is wrong.  But sadly I'd already stitched this muslin together by the time I'd worked it out.  So I unpicked it - again - and cut a bit off and stitched it together.  And thats when it looked like the photo above.

This shows the changes I made to my pattern pieces

The purple bits are the bits I cut off the second muslin to make it fit properly.

And then I realised I should really do a muslin of the sleeve too, since I'd made the adjustments to that part of the pattern as well.  I added some width to the sleeve and redrew the cap and inserted it into the muslin


Hooray!  It fit!!  I did have to taper the sleeve a bit, and cut it shorter to make it more bracelet length like the inspiration suit, than full length like the original.  BUT IT WAS DONE!

I unpicked it all and ironed it all flat and turned it into a paper pattern so I could use it again in the future.

It was enough work for one day I can tell you!

So about the name for this suit... can anyone come up with something???  I keep thinking raspberry something, but all inspiration has left me at this point!!! hahaha

Beccie
xxx

Friday, February 14, 2014

Valentines Day GIVEAWAY!

Yes, I said GIVEAWAY!  But some serious stuff first.

I think there is too much focus on Valentines Day on loving someone else, and not enough on loving you.


I have a tendency to give myself a hard time about the smallest things.  This week I have been struggling with negative self-talk, and had myself convinced that I would be a failure at the venture I am planning.  I even convinced myself that my sewing skills aren't good enough for me to have this blog and the associated facebook page.


Why do we do this to ourselves?

I know I'm not the only one who struggles with this kind of thing, I'm willing to bet that most of you also have a problem loving yourselves.  I have a saying stuck to my computer screen, and I try and stick by this:

Stop hating yourself for everything you aren't.
Start loving yourself for everything that you are.

I think this Valentines Day we should concentrate on loving ourselves, and being kind to ourselves.


But enough of the serious stuff - lets get to the giveaway!

To show my love an appreciation for all of you, for your kind words and support, I want to giveaway a dress kit.  Yes, everything you need to make this dress:

You will get:
- the pattern
-the red polka dot fabric for the dress
- white fabric to make the trim on the bodice
- red fabric for the jacket
- zipper, thread, and bias tape

And I'm not going to make you jump through hoops to get it!  All I want you to do is comment on this post and tell me one thing you love about yourself.  Miss Stella will draw the winner next Thursday the 20th of February after 5pm (thats Australian time by the way), and I'll announce the winner here on Friday the 21st.

I'll start:

I love the way that I love a challenge and I won't quit.  Doesn't matter if its sewing, or at the gym, or whatever.  Give me a task and I will fight through all kinds of obstacles until its done.  I love my determination.

So comment away!  What do you love about you?

Beccie
xxx

Wednesday, February 12, 2014

The Paradise Dress!!!

(I just edited the title of this post, because someone commented that the name of the dress should be changed... and it was a great idea!!!)

I was so excited to finish this dress so as soon as I had free time on the weekend I was back into it.

First job was to sew down the bias trim on the top skirt layer and put in the zipper - all pretty straight forward really... then the real job started - the underskirt.

The lower half of the underskirt is made up of a 9 metre long piece of fabric that is pleated in one inch pleats and then sewn to the circle skirt that makes up the top half of the underskirt.  I sewed together the four lengths I had cut to make up the 9 metres, and then hemmed it.  Definitely wasn't going to be doing that afterwards!  Then I prepared myself to spend an indeterminate amount of time pleating:


Yes, I moved my ironing board in front of the TV and put on Land Girls.  I really enjoyed it!  The plot was predictable and the acting was mediocre... but the clothing!!!  THE CLOTHING!!!  There were several things I completely fell in love with, its worth watching for that alone.

Anyway, after a while I had no pins left in my pincushion, and this pile of pleated fabric...


...which I then pinned to to the circle that makes up the top half of the underskirt.  This also took some time.  By the time I got that job done I was pretty addicted to having a DVD on while I did what I was doing, so I set up my laptop on my sewing bench and continued to work on the skirt.


Can I say that sewing the underskirt together took a bit of patience.  It wasn't difficult, but it was A LOT of fabric to manipulate through the machine.  First pass I sewed the layers together, second pass I sewed self made bias tape around the raw edge, then the third and final pass I sewed the bias taped seam up to the circle skirt.


By then I was tired of having to deal with that much fabric, so I spread it out on the floor in the lounge room so I didn't have to think about it for a bit...


So much fabric!!!!  Miss Stella came in for a lie down and I felt like joining her!


I didn't get to ignore the underskirt for very long because the next job was sewing the bodice lining to the underskirt.  But I did get to ignore it for a bit longer because first I had to measure the lengths of the boning that I needed and get them cut.  This meant a quick trip up the road to my parents place (thanks Dad!).

I also needed to change DVDs because I'd finished Land Girls.


When I purchased Land Girls, I also purchased seasons 1 and 2 of The Paradise.  I love Victorian England almost as much as I like the 1940s and 1950s!  But anyway, back to the sewing!

I sewed the bodice lining to the underskirt, and then I inserted the spiral steel boning into the casings and sewed both layers together at the top.  I then took great pleasure in turning it all the right way out and putting it on my headless helper.  I do need to do a bit of hand sewing (I need to sew the bodice lining to the zipper tape, and I also want to sew both layers together at the waist seam), but its pretty much finished!

there are two petticoats under there...

On to the bolero!

The pattern I used to make the bolero was a different shape at the front to the original, and I had to cut a fair bit away to make it the shape I wanted.  I did this by putting the lining layer on my headless helper and attacking it with my water soluble texta.  This is how much I cut off:


This bolero is pretty straight forward to put together  I just sew the darts, put the lining and the outer fabric together at the shoulders and the sides, insert one inside the other, sew them together turn them through, and finish the bits I didn't sew together.

Ok, so that sounds complicated.  It really isn't!


Oh, and the best thing about this design is that ITS REVERSIBLE!!!

Here is the finished outfit:


It was such a labour of love, but damn its impressive to look at!!!

Sadly I have nowhere to wear this dress at the moment... anyone want to throw me a party?  But seriously, I'm working on coming up with a scenario for photos, because I know you really want to see what this looks like on!!!

Beccie
xxx

Friday, February 7, 2014

I Could Starve Myself for 1000 years....

... or make myself a version that fits!!!

Have you ever come across something that you prayed would fit you, and it doesn't?


That's how I felt when I saw this dress on Etsy.  If you're interested you can see the listing here.  Even though it didn't (and would never) fit me, I kept it in my favourites, knowing that at some point I'd want to remake it.

Well, that time is now.  I thought it would be a wonderful hurrah to summer dresses before I start making suits.

Here are the fabrics I chose:

I just love the intensity of these colours together!

As for the pattern, I'm using a whole bunch of self-drafted bits that I used for other things.  The bodice is from this dress, the skirt is just a circle skirt with some modifications, and the bolero is from this outfit

I started cutting out and before I knew it I had this pile:


It was pretty straight forward, with only the skirt pieces requiring extra brain power.  I used the same skirt pieces I always use, but just cut them down in size.  The inner skirt (the blue one) has the pleated frill so it got cut to half the length that it would normally be.  The frill, when attached, will make up the rest of the length.  The fashion fabric skirt (the pink one) was cut 6 inches longer than the blue fabric skirt.

 The point of the scissors is approximately where the frill will end on the underskirt.

But then the fun bit - the creating!

First I sewed up both bodices, the pink one for the outside and the blue one for the lining.  To the blue one I sewed in some boning casings along the seam lines:


On the pink one, I added blue bias trim along the top edge:


I just love the way the blue looks against the pink.  And yes I know I should have hand sewed it on... and I would do that if it was for someone else... but its just for me... and who would actually look at it this closely???

Then I hemmed the pink fabric skirt (ugh! hemming circle skirts is an awful job!) and pinned on more bias trim for good measure:


But that is as far as I got before I got called away, sadly.

I'm really looking forward to getting back into this project!  But I'm not looking forward to 1" pleating nine metres of fabric for the ruffle on the underskirt...

Beccie
xxx