Tuesday, April 29, 2014

It Doesn't Get Much Cuter Than This.....

A little while back my friend Renee asked me to recreate her favourite vintage dress (you can read about it here).  I made a test version first, which fit her perfectly, and then I made her actual dress out of this amazing Llama fabric we found.

When I sent it to her I said that it would be great to get some photos of her wearing it... but I didn't expect her to go to all this effort!

Every time I posted a photo of the fabric there is a lot of interest, so I imagine that the photos from the shoot she did for me with ACTUAL LLAMAS will go off the charts!

Miss Renee - you are divine.  I love you!!!


 Marley's fluffy ears make me melt!


As well as thanking Renee for organising this fabulous shoot for me, thanks must go to Renee's daughter Talitha who had to be the photographer.  Darling, you did a spectacular job!

It really doesn't get much cuter than that, does it?

Beccie
xxx

Thursday, April 24, 2014

Cocktails and Peplums - almost done!

And when I say almost, I'm so close to finishing I could pretty much say it is done.  All I've got left to do is sew in the shoulder pads and make a belt.

But I'm jumping forward.

When I last talked about this make, I had just put the bodice together and had hand rolled the peplum pieces.  The obvious starting point was putting in the sleeves.  Every time a pattern calls for setting in sleeves, I always do everything I can to the sleeve piece before I set it in. Especially the cuff/hem.  Doing that bit when its already attached to the bodice can be fiddly because there is so much more fabric to manipulate.

And yes, I should have taken a photo, but I didn't...

I must say though, I've had a bit of trouble setting in sleeves with the past couple of patterns.  There has been too much fabric to gather into too small a hole.  Not this pattern however!  This one went in like a dream!

Not a wrinkle or a gather in sight!


I noticed once I had the sleeves in the bodice that the sleeves were way longer than the pattern envelope gave me the impression they would be.  Now, we all know that pattern envelopes are notorious for lying, but I really liked the look of the shorter sleeves, so I folded the hem up as short as I could and left it at that.

Then I worked on the skirt.  Which meant working on the peplum first.

I pinned and sewed the gathers, and ironed them and was very happy with how it looked.


These two peplum pieces are attached to the front skirt piece before the skirt is sewed together.  One is sewed at the waist, and the second one is sewed in a diagonal line about half way down the skirt.


I pinned the lower piece so the raw edge would be underneath the peplum with the dress was being worn, and I pinked the raw edge to stop it unraveling.

I then sewed the skirt front and back together (easy) and sewed the completed skirt to the bodice (also easy!).  And I had a dress that was pretty much finished when you ignored the fact in needed a lot of hand sewing!


But I realised this dress was going to need two things to really be complete - shoulder pads, and a self covered belt.  A while I ago I bought 10 vintage self covered belt kits on Etsy that I have been hoarding for very VERY special projects.  This is a very worthy project, so I broke out a kit and set the belting aside to flatten out - its been folded up for a very long time.

I also broke out a pair of commercial shoulder pads, but they are really ugly, so I covered them with some of the leftover fabric.

It was really simple - I cut circles of fabric, wrapped them around the shoulder pads, and stitched so the line of stitching caught the edge of the shoulder pad, and finally pinked the raw edges.  Ta-daaa!

much less ugly!

Then I took everything down stairs and outside onto my sun-lounge to enjoy the day and get my hand sewing done.  I had to:
  • Hand pick the zipper
  • Roll hem the neckline and stitch down to the back of the neck and at the V
  • Sew down the hem of the sleeve
  • Sew the hem of the skirt
  • Sew in the shoulder pads
That is a lot of hand sewing!  I got almost all of it done, just the shoulder pads to go.  And the belt, which I will get done this weekend.

It was so relaxing!!!

I'm going to a sewing group meet-up interstate on the 3rd of May, and I've decided that I will debut this dress at the meet-up!  As well as having lunch we are having a pattern and fabric swap, so I'm really excited to go!  And because its interstate, I'm going to a vintage festival the following day - Garterbelts and Gasoline - so I'm planning on making an outfit this weekend to wear to that.

I'm going to use this pattern, which I just realised is from 1938!


I'm going to make the version on the right (with the two different fabrics).  I recently impulse purchased some amazing flamingo print RAYON at Spotlight, and went back to find a contrasting rayon for the bodice.


I posted this photo on my facebook page to ask which colour I should use, and the response was really divided.  I had hoped (like I always do) for a clear answer, but I didn't get one so I'm still one the fence a little bit.  So I figured I would ask here too! 

Pink or Blue?????

I can't guarantee I will make what you choose, but I will listen to all your arguments!

Beccie
xxx

Thursday, April 17, 2014

Cocktails and Peplums

One of the things I enjoy doing when I'm relaxing at home on the couch at night in front of the TV is wade through the oodles of 1940s and 1950s vintage goodies on Etsy on my iPad.  You see, my husband (love him) is a remote hog, so I don't get a look in on the programs we watch.  Thank goodness he doesn't watch sports constantly!

Anyway, one night I found this fabulous pattern, in my size!!!


And I knew immediately that I had the perfect fabric, but still I hesitated, and it was only after some (minimal) arm twisting when I posted the picture on my facebook page that I purchased it.

I was drawn to the dress on the right - version 2 with the double peplum - and the perfect fabric in my stash was this vintage rayon that I purchased on Etsy some time back.

Its covered in martini glasses!!!

I was so excited about this project that it jumped the queue of all my other projects and I just had to sew it next.

My first few stitches on my sewing machine were not happy ones however.  It kept jamming and it was tearing holes in the fabric... eek!!!  I did some investigating, and:

*cough* maintenance is not my strong point *cough*

I got this much fluff and yuck out of and around the bobbin casing:

Ugh!

That seemed to solve my problem, and I sewed up the bodice with no more jamming.  Its actually a fabulous, easy to sew design!


Here is a close up of the gathers in the V neck:


I am debating removing some of the fullness at the waist, but thats just going off how it looks on my headless helper, I haven't measured it yet.

The next job was working on the peplum pieces, as they are sewn into the right side skirt seam.  This involved a new skill for me - ROLLED HEMS!

I actually found a brilliant Youtube video that explained it really well (you can find it here).  Its long but very informative.  Here is my short, non-video version.

1. Insert a needle about 1/8" from the edge, fold the fabric over, and make the pattern shown in the picture below starting with a stitch over the fold down to the edge of the fold, take a teenie stitch through the underneath fabric only, then go back up to the fold, insert your needle and take a big stitch so the thread goes in between the two layers.  Repeat ad nauseam.

I've outlined the thread path in pretty colours.  GREEN is the stitches you can see, YELLOW are the little teenie stitches you can see from the other side of the fabric, and PURPLE are long stitches in between the two layers.

2.  Once you have a bunch of stitches done (I was working to about 15) you tug on the thread and it all rolls up neatly, like magic!!


3.  I then ran the back of my needle under the roll to neaten everything up:

Its a tad blurry, sorry.

I found it handy to do this on a pillow on my lap, because I then put in a pin at the second to last stitch to secure the fabric to the pillow before I did my next 15 stitches.

It was actually quite a relaxing process, and a good repetitive stitch that was perfect to do in front of some trash TV (I love trash TV)

And that's as far as I've gotten on this one.  I hope to have it finished to wear to a sewing group meet-up that I'm going to on the 3rd of May.  I figured I should wear something that I've created.

So, what's you're favourite TV show to hand-sew or do other chores in front of?

Mine is anything relating to girls trying on wedding dresses, Don't Tell The Bride - where the boys plan the weddings in 4 weeks without any help or contact from the girls, the UK version of Come Dine With Me - the announcer is hilarious, and How Do I Look - where people with truly tragic and misguided fashion are convinced to undergo a makeover.

Beccie
xxx

Tuesday, April 15, 2014

Making Adjustments to Vintage Clothing

I am of the firm opinion that altering vintage clothing is a no-no.  If its made it 60 or 70 years in its original form, who am I to change it?  And people who do 'upcycle' vintage should be hung, drawn and quartered.

Here is an example I recently found on Etsy.

That awful octopus is heat fused on there, so there is no going back.
And its not even a happy octopus - its frowning!  It doesn't like it either!!

However, repairing vintage to make it wearable again, and in doing so maintaining the integrity and style of the original dress is just fine.  For the above example, if there was a giant nasty stain or a hole where they stuck that octopus, I would have patched it, or covered it with SOMETHING SUITABLE AND MID CENTURY!!!  Not a giant bloody turquoise octopus!!!  Who on earth is going to wear that now!!!

*deep breath Beccie*

It makes me so mad!

Anyway, lets talk about the dress I adjusted on the weekend.  This discussion will not involve octopuses (octopi???)

Recently I purchased a lovely dress from the facebook group for buying, selling, and swapping mid century clothing - Ooh La La.  When it arrived I noticed that it was VERY yellow, had a few minor spot stains, and had a faint odour.  I decided that it was nothing that a good soak wouldn't cure, and I was right!  There is hardly any yellowing left and the spot stains have gone too!!  But gee the water was a revolting colour, and stank to high heaven!!!  I wish I'd taken some before photos... and had a way to record and play back the smell...  Actually, no I don't.

I put it on and realised that although the bodice was the perfect length, the skirt was not.  It was sooooo long - mid calf on me, the 'dowdy length'.  Even with quite high heels it still didn't look right.  Here is a before photo on my headless helper:

Isn't she gorgeous!  You can see why I completely fell in love with her!

I don't have a before photo of the dress on me, because I didn't wish to be looking dowdy even if it was for illustrative purposes.  So the photo above will have to do.

I loved the dress and wanted to keep it, so the skirt needed to be shorter.  And since there is a border design, I couldn't hem it.  Instead I would have to unpick the skirt from the waistband, make my adjustments and sew it all back together the same way to make it look original.

I was also going to be limited in the amount that I chopped off, due to the placement of the buttons.  To keep the distance between the buttons the same, I decided to cut the skirt at the first button down from the waistband. 


This would shorten the length of the skirt by 2 1/2 inches, from 30 inches to 27 1/2 inches.  Whilst I would have liked to get it to 26 inches, I figured that would be good enough.

So I started very carefully unpicking the skirt from the waistband, and started thinking about the dress itself.  I had decided from the shape of it (and I'm no clothing historian) that it was from the 1940s, and I had inspected the dress thoroughly and there was not a tag to be found.  I assumed it was an expertly sewn home job, but when I unpicked the skirt and noticed the 1/2" seam allowance, I was convinced.  This is because patterns printed in the 1940s were made with a 1/2" seam allowance!!  Does anyone have any further opinions on this?  Or have seen the pattern maybe???

I also enjoyed unpicking the parts of the waistband that went through the centre of a flower, because you could see just how much the print had faded over time.

The colours would have been so bright when she was new, but I still love her in all her faded glory.

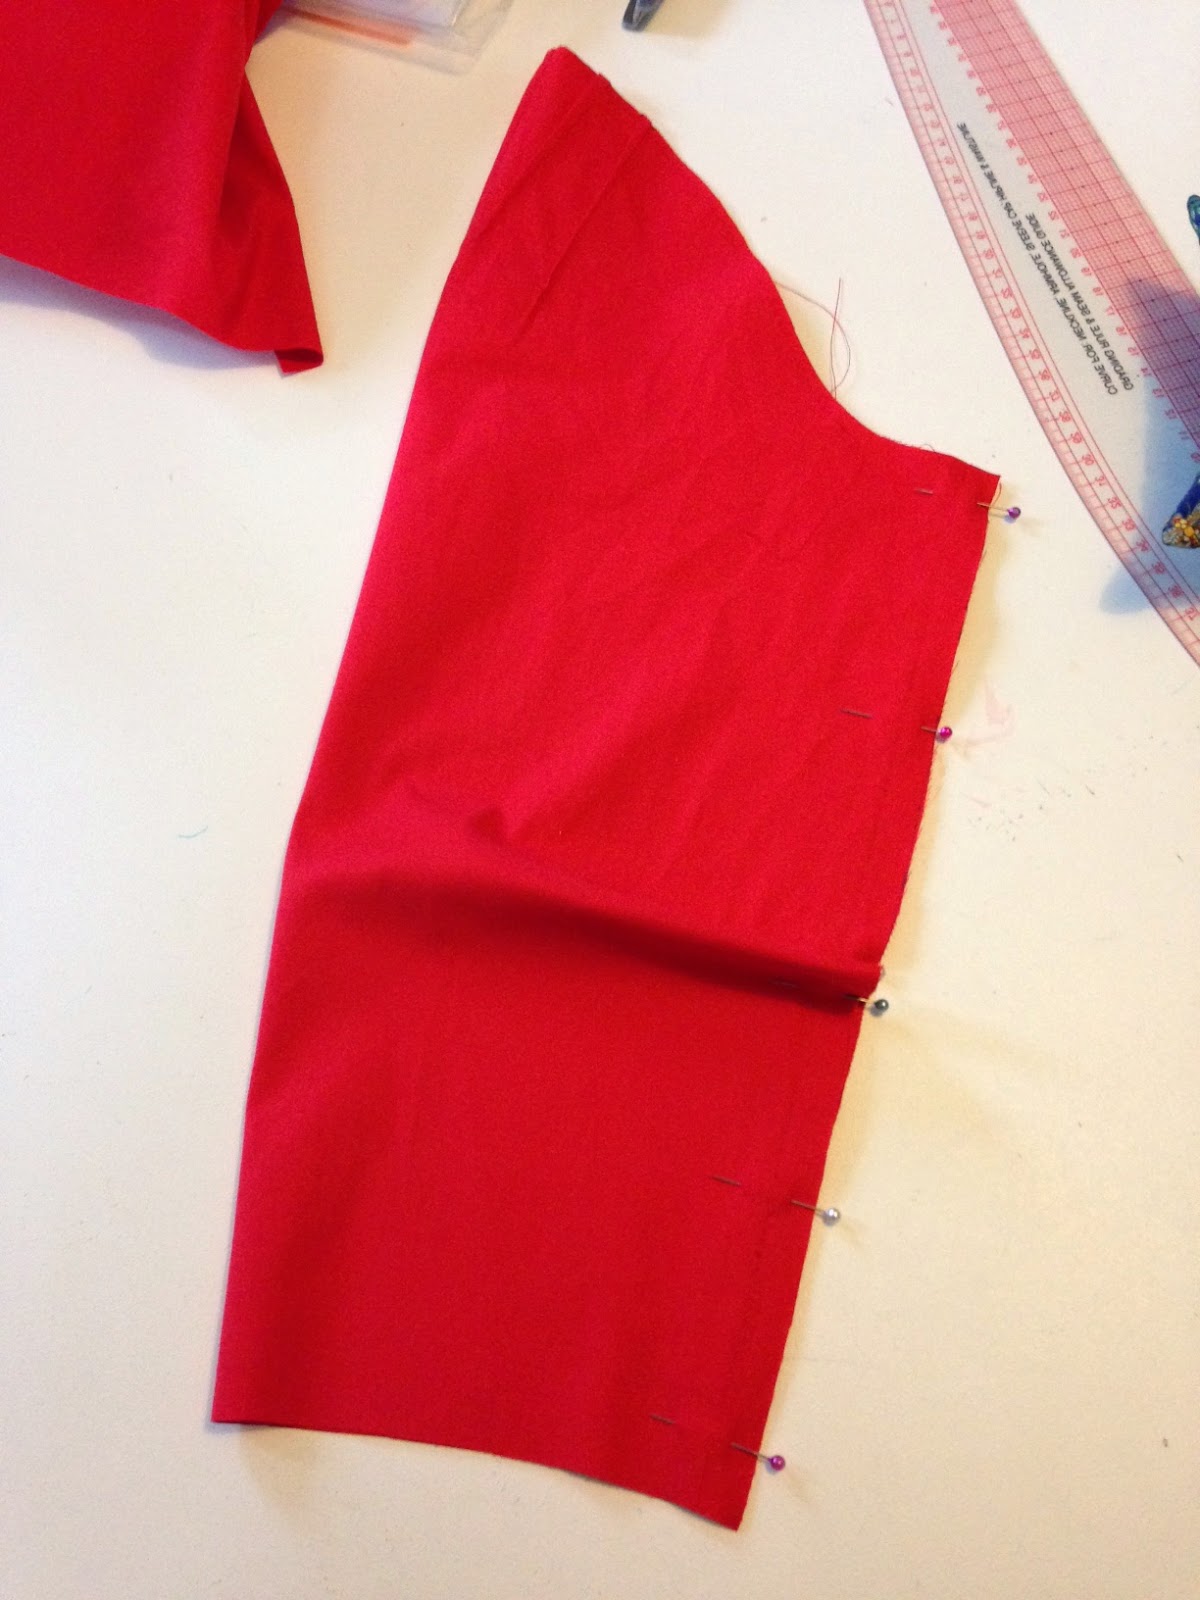
Then came the moment of truth, when there was no going back.  Cutting off the excess inches.

I drew a line so it would be straight-ish, and went at it bravely.

Then I gathered and pinned and sewed and ironed and top-sewed, and put it back on my headless helper.

It is definitely shorter!

All I had to do to finish it was sew two buttons (one I cut off by mistake - oops!) and a hook and eye back on and I was done.  All in all a much easier project than I anticipated!  It is one of those icky jobs, but it was perfect for a down-in-the-dumps Sunday afternoon pick-me-up.

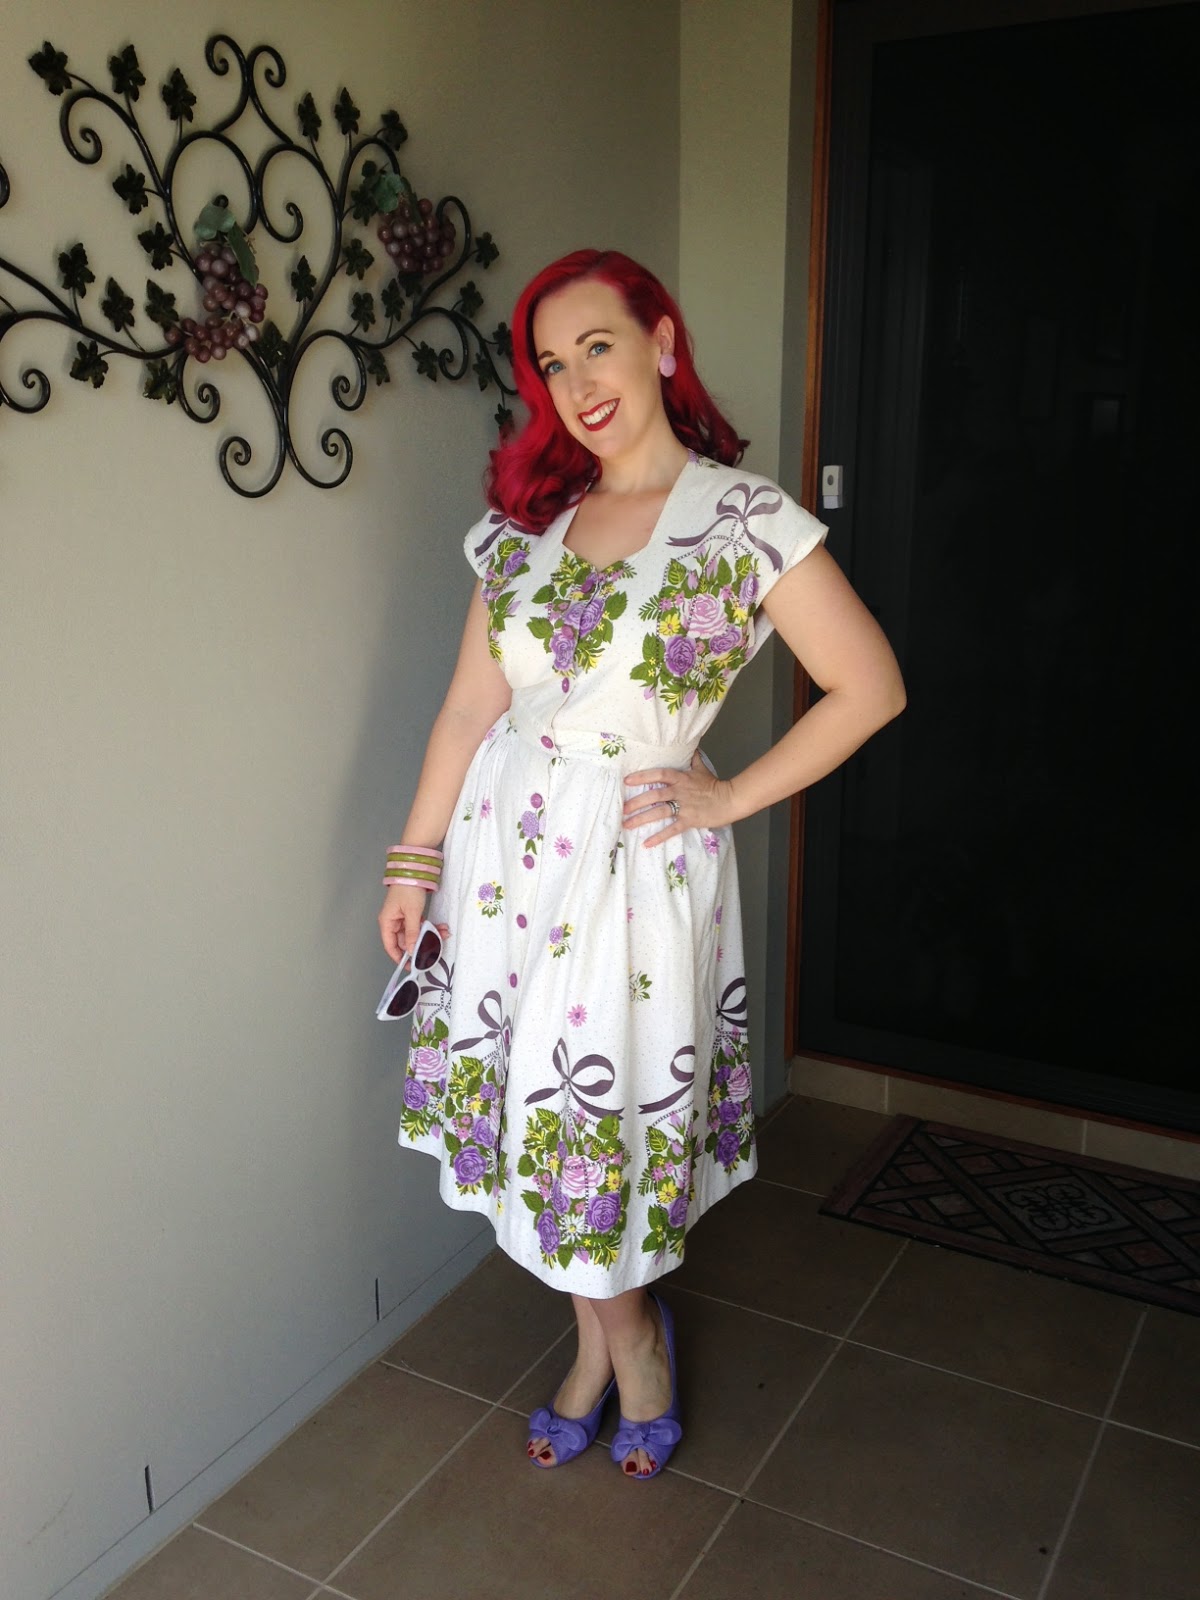
And I wore it yesterday with pride!


Its still long, but you can imagine how much longer it would have looked before...

This project was such a success that I've realised there are a few other dresses that could benefit from the same treatment!  However, I think they have zips in the side...which would make it much more difficult.  On second thoughts, I think they'll just stay as they are.

Please feel free to have your say about upcycling in the comments section!

Beccie
xxx

Thursday, April 10, 2014

A Ruby Dress for Miss Ruby

Recently I was contacted by this lovely lady - Miss Ruby Rabbit

I'm sorry, I don't know who took this lovely photo, but when I find out I will credit them and add a link to their website if they have one.

Miss Ruby wanted me to make her a specific dress, and after getting a few inspiration photos from her, I decided that this pattern was just perfect:
And even better, it was one I had been coveting for myself for a while... what a win/win!!!  So I purchased the pattern and some fabric and waited for the pattern to arrive in the post.  Which didn't take long...

I sewed up the bodice and instantly fell in love with the collar!

As did the 71 people who clicked like on my Facebook page...

But the sleeves.... they had some issues.

It sometimes happens that patterns come with small issues.  With this one, it was like the sleeve piece was for a completely different garment!  The sleeves piece was for a full length sleeve (which is great, gives me plenty of options) but one side was longer than the other - so a dart was missing - and the sleeve cap was huge, there was no way that it could be eased in...

 So I added a dart...

and I chopped some height off the sleeve cap
I don't know if this is the 'proper' thing to do, but it worked

The sleeve cap was now only a wee bit too large for the arm hole, so I concentrated the gathers at the shoulder for what I think is a pleasing effect.


And I got on with the skirt... which involved bound button holes...

part way through the process

and a proper gathered hem

I know its hard to see with all the red on red...

The gathered hem was a total revelation.  I had never done one before because I thought it would be a complete pain in the behind, but it was the opposite!

Just in case you aren't sure what a gathered hem is, I'll explain it.  When you turn the hem of a circle skirt (or other curved skirts) up, the bit you turn up is longer than the bit you are turning it too, so it won't lie flat.  To fix this you run a gathering stitch around the edge (I did mine in quarters) of the skirt, and use that to gather the turned up bit in so its the same length as the bit you are turning it to.

Make sense?

Clear as mud, right!

But seriously, next time you are hemming a curve, try this.

Anyway, back to the dress.  After a fair bit of hand sewing, I had a finished dress!!!


Miss Ruby loves it, and I can't wait to see a photo of her wearing it!  It has also inspired the next person in my commission dress queue, and her dress will be similar but with a few modifications... and then I think I want one too, in some lovely wool suiting.  I think it will be the perfect winter work dress!

Beccie
xxx


Tuesday, April 8, 2014

Raspberry Darling SKIRT

What's a suit without a bottom half... its just a jacket.

An awesome jacket, but still just a jacket.  I want a SUIT!

The accompanying skirt has 8-gores, with the pieces wider at the bottom than they are at the top, so you end up with a lovely A line skirt.  I wasn't sure how this was going to work out with my stripey fabric however.  Pattern matching is all well and good, but sometimes near impossible.  So I decided to concentrate on getting the front and back to line up and leave the rest in the lap of the gods.

I cut out each gore so that the centre of the piece was a vertical stripe, and then bound the edges with satin bias tape.  The same as the stuff I've used in the jacket.  Can I just say you use waaaaaaaaaay more of that stuff than you think you will!!!

 Looks pretty on the inside!

I then sewed the pieces together so I had a front, a back, a right side, and a left side (with a zipper in it).  Then I sewed them all together and...


All the lines line up pretty well - even on the pieces I didn't try to line up!!!  HOORAY!!!

Then came the waistband.  I didn't use the pattern piece, as I'd had to make an adjustment to the size of the skirt.  Normally I would just cut out a rectangle, but I didn't have a piece wide enough to cut one with the stripe running horizontal, so I thought I would cut two halves... but then I realized that the front piece needed to be longer than the back piece so there would be an overlap for a press-stud or something...

Thank goodness for handy scraps of paper to scribble on!

That all sewed up easily and even went on to the skirt easily, and left me with a nice little overlap.

Please excuse awfully chipped nail polish... its on my to-do list I promise!

For the hem, I folded it up and steamed out the excess (gotta love wool!), and sewed on yet more bias tape.  I haven't hand sewed it yet, but I haven't finished all the hand sewing on the jacket yet either... I hope to get that done this week.  And here is the skirt!

I had to clip this on my headless helper for the photo, so when I put this on its slightly too big, but not so much that its a problem.  I should have realised that it was going to be a fraction big when I measured for the waistband... obviously wasn't paying enough attention at the time... I might yet take the waistband off and make it fit better...

The suit all together looks like this!


 Yes, the back of the jacket needs an iron... or a steam or something

So that's it for making the Raspberry Darling suit, but its not time for the photoshoot yet... not until I finish the hats!!!  (note: I'm not making hats, just adjusting others to be more appropriate.  I wish I could make hats... one day...)

Beccie
xxx