Recently I put a call out amongst the members of my Facebook group - The Sew Retro Rose Lovely Ladies - for some guest posts for my blog. I have some big plans that require me to put my attentions elsewhere for a little while, and the last thing I wanted to do was leave you all hanging if I didn't have to!
You will still hear from me here, and I will still be on my Facebook page, but trust me - this other thing I'm putting my attentions into will be worth it for all of us!
So without further delay from me, here's Dixie!
----------------------------------------------------------
Hello all you lovely readers of Sew Retro Rose!
Beccie has been lovely enough to allow me to take over her
blog for a post, so I thought I’d give you all a nice easy quick project. If
you have a slight understanding of crocheting, you can get this done in under
an hour. If you’re a complete novice, it may take a bit more time, but it is
really easy, I promise!
Now I will apologise in advance, I am not a very experienced
Crocheter myself, so I may not use the correct terminology all the time, but I
will try my best to make this pattern/tutorial as easy to follow as possible.

Supplies:
- A reasonably thin yarn (not thick and fluffy) I am using Patons Cotton Blend 8 ply which is a fairly tightly wound yarn, that almost has a rope like feel, rather than a fluffy wool type feel. Thin 4 or 5 ply baby wool/yarn also works. It’s all about getting the right tension so that the snood has lots of flexibility and movement.
- A large guage crochet hook. I am using an 8mm for this one, but have previously used a 6.5mm with 4ply baby wool
- Some narrow elastic, enough to fit around your head where you want the snood to sit, minus roughly 1 inch/2.5 cm. I am using 6mm braided elastic, but anything narrower will work too, this is just the smallest I had. You could even use hat elastic, but you may need to use a shorter length to make sure it sits snugly.
- A pair of scissors
- Some Chocolate and a hot beverage of your choice to keep you going. (Every project should be accompanied by hot beverage and chocolate! - Beccie)

Pull the knot tight while the loop is on your crochet hook

Hold the knot section firmly between your left thumb and
middle finger (or whatever works best for you) and have the yarn (that is
attached to the ball, not the short end) going over your index finger and being
held in your hand with your ring and pinky finger. Holding the crochet hook
with your right hand, hook around the yarn.

Now pull the yarn through the original loop. Turning the
crochet hook can help it get a better grip on the yarn.

Now you have completed 1 chain stitch. Repeat this process
of pulling a new yarn loop through the existing yarn loops until you have 8
chain stitches.

Your 8 chain stitches should look something like this.

Now, while keeping the existing loop on your hook, put it
through the first chain stitch you made, forming a ring of stitches.

Use your hook to grab the yarn.

Then pull the yarn through both of the loops already on your
hook.

Use your hook to grab the yarn again, to pull through to
make another chain stitch.

Make 2 more chain stiches, giving you 3 in total.

Now we are going to start our first Treble stitch. This may
seem a bit confusing at first, but hopefully my directions make sense, and by
the time you finish your snood, it will come easily. Firstly grab the yarn with
your hook.

Bring the hook downwards, making sure the yarn stays looped
around it.

Insert your hook through the middle of the ring of stitches
from the front to the back.

Use your hook to once again grab the yarn.

Pull the yarn through the middle of the ring to the front.

You should now have 3 loops on your hook. Grab the loose
yarn with your hook again.

Pull the yarn through the first 2 loops only, creating 1 new
loop and leaving 1 existing loop.

Grab the yarn again, and pull it through the remaining 2
loops on the hook.

Yay! You have now completed your first treble! Now make one
chain stitch.

Start on your second treble, by grabbing the yarn and going
through the middle of the ring. Once through, grab the yarn again, come back
through to the front, grab the yarn once again, pulling it through the first 2
loops, then grab the yarn with your hook once more and pull through the
remaining 2 loops. Make one chain stitch.
Oh look! Now you have 2 Trebles!

Repeat the pattern, treble, chain, treble chain until you
have a complete circle. I did 10 treble Stitches (not including the original 3
chain stitches).

Attach the last stitch with the original 3 chain stitches by
inserting the hook through the gap made by the chain stitches and the first
treble and grabbing the yarn through it.

Pull the yarn that you grabbed through the gap all the way
through the existing loop on your hook (so you should just have 1 loop on it).

Make 3 chain stitches, then another 1 chain stitch (4 in
total).

You are now going to do the same as the previous row, but
each treble will be made in the gaps made by the previous row, and between each
treble you will now be making 2 chain stitches instead of one.

When you have completed the row, join it the same way as the
row before. The third row is completed the same way as the second, but increase
the gaps to be 3 chain stitches instead of 2.

The fourth row is slightly different. We will be going back
to treble, chain, treble, chain, but in each of the gaps formed by the row
before, we are going to be attaching 2 trebles, with a chain stitch in between.
Finish the row the same as previous rows.

The fifth row is stitched the same as the second row.
Treble, 2 chains, treble 2 chains, repeat to end.

The Sixth row follows the same pattern as the third row.
Treble, 3 chains, treble, 3 chains, repeat to end.
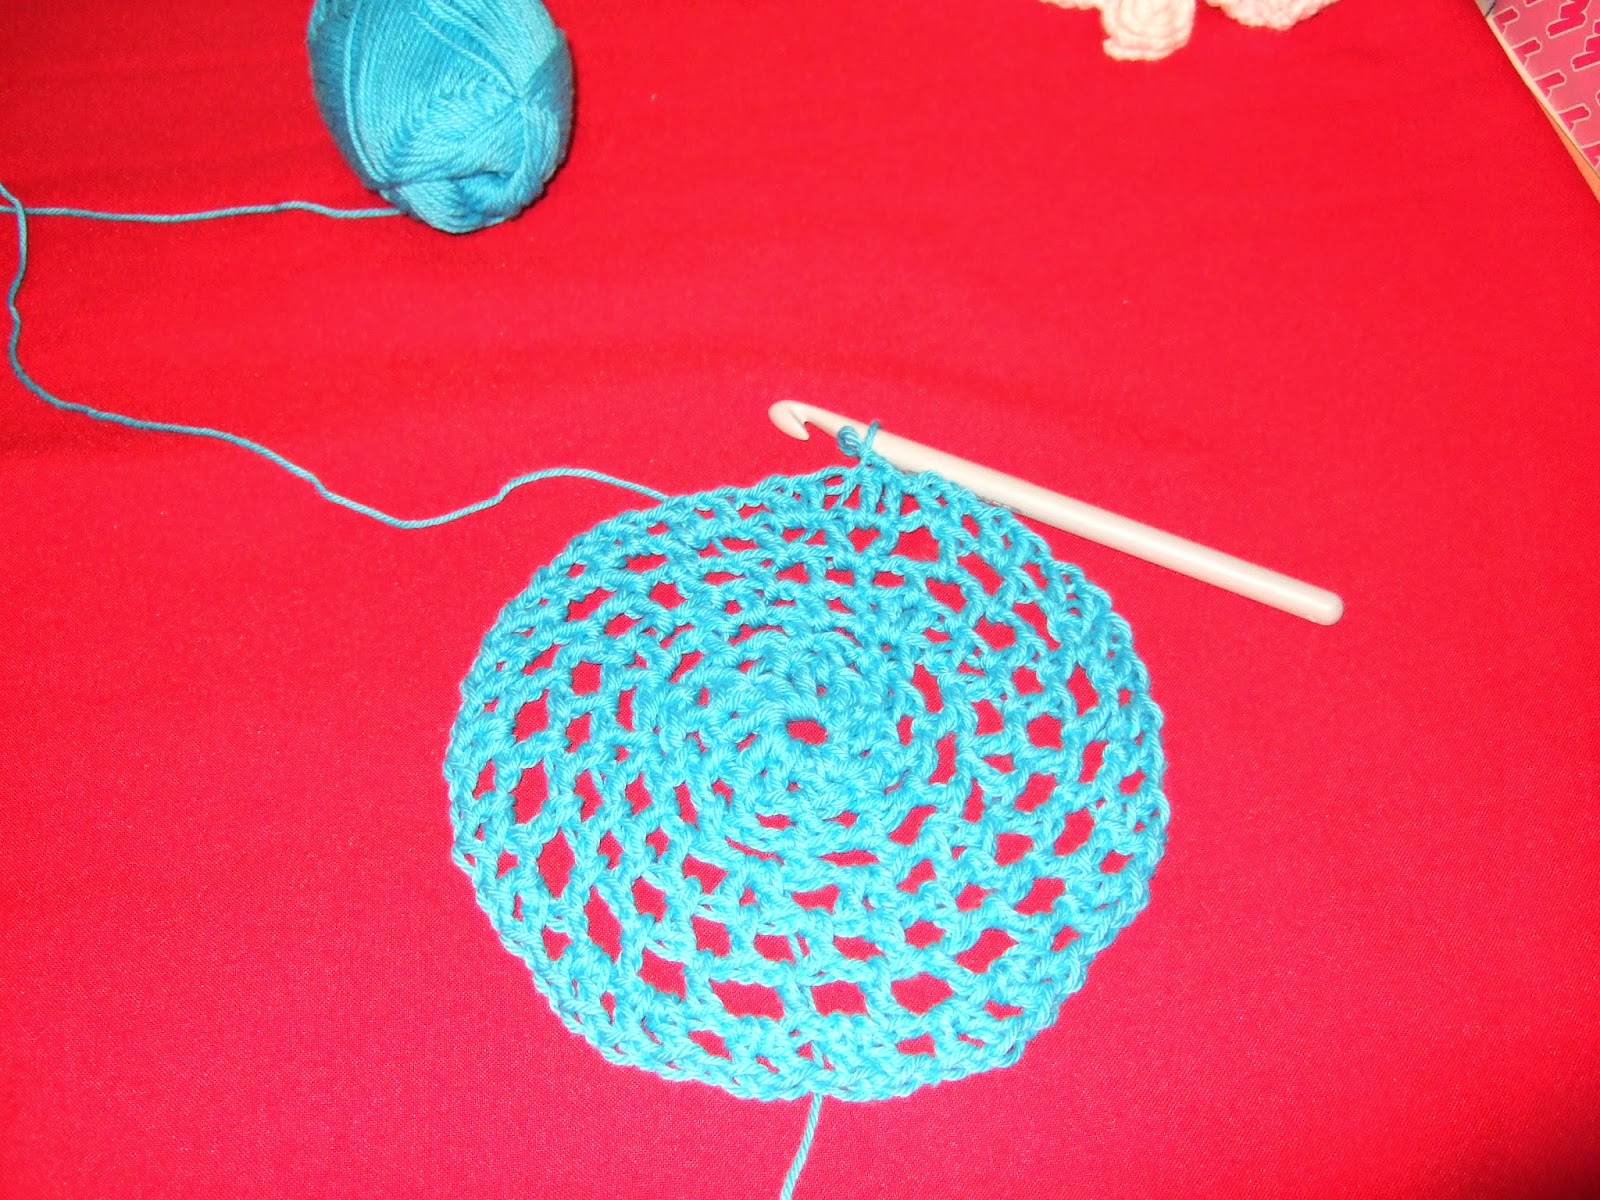
The seventh row is as the fourth one was. 2 trebles in each
gap, with 1 chain stitch between each treble.

At this point I have a wide cone like shape, roughly the
size of my head. If yours is quite a bit smaller, your tension may be too
tight, or your hook too small. Either add extra rows following the pattern we
have been using to increase the size, or start over using a larger hook or looser
tension. If yours has turned out too large, simply unravel a row or 2 til it is
the right size.

For the next (Eighth) row, I am up to treble, 2 chain,
treble, 2 chain. If you have changed the size of your base you may need to use
a different combination (treble and 1 chain, or treble and 3 chain) At the time
of this photo, I had done 4 rows, and you can see the edge has turned upwards.
I then stitched another 4 rows in this pattern, then decreased slightly for the
next 3 rows by stitching only 1 chain between each treble, instead of 2. If you
have a lot of hair, you may want to make yours deeper by adding in extra rows.

Take the piece of elastic and sew the end together to form a
loop, or if using hat elastic, tie the ends together with a secure knot. Attach
the Elastic to the snood by crocheting around it.

Hold the elastic loop up against the edge of the snood. Take
your crochet hook and insert it through the gap to the back of your work and
grab the yarn with the hook.

Pull the yarn through to the front, then use the hook to
grab the yarn again.

Pull the yarn that you have just grabbed with your hook
through the 2 loops already on the hook. Repeat this stitch 3 or 4 times in
each gap, so they yarn mostly covers the elastic.

Here’s what it should be looking like.

Once you have completely gone around the elastic, pull the
end of the yarn through (cutting of the extra yarn first) and pull tightly. If
you want, tie the yarn around the elastic once or twice to make it more secure,
then cut off the excess yarn.

As you can see, by the time I finished I had very little
yarn left, so if you need to make yours bigger, or your tension is very
different to mine and uses up more yarn, you may want to purchase 2 50g balls
(or a 100g ball) Also, different yarns may have different lengths, but the same
weight. The label from the yarn I used says it is approx. 95m.
Finished!


And now you have a fabulous new Snood to wear with pride! I
like to wear mine with victory rolls, and use 3 bobby pins to hold it in place.
1 behind each ear and 1 on top of my head!


See how great it looks? I’m going to be making these in
every colour!
If you’re interested in seeing more
tutorials/patterns/recipes/
Thanks for having me here,
Dixie
----------------------------------------------------------
Oh well done Miss Dixie! I've been looking at snoods just recently, but the commercially available ones have too much space for hair. Now I can make my own!!! Thank you so much for sharing your pattern.
Beccie
xxx