Friday, April 10, 2015

Capelet Sewalong : The Final Round-up!

What a great sewalong!  I hope you all enjoyed following along if you weren't sewing.  Thanks also goes to Decades of Style for giving us all a discount on the pattern.

Since finishing and wearing our capelets, and posting photos wearing them in the Facebook group, we have noticed just how versatile this garment is!  It can be dressed down with jeans, it can be dressed up with a fancy skirt or tailored pants, it can even be made from light fabric and worn as a blouse!  I honestly don't think this pattern is given enough credit, and I also think a lot of people have passed it over as being too odd.  Not true!

And here's the proof - our finished garments!  I'm pretty sure that once you've seen these you will want to sew one for yourself.

Diana Cruz-Hasler
Diana used some favourite fabric from her stash to make her capelet.  I love how the gold buttons bring out the gold in the fabric.


Meet Diana's two 'monkeys' Sierra and Chloe, who insisted in being in one of the photos.

Eszter Molnar
This lovely lady speed sewed through her capelet, only starting three days before the deadline - but how amazing is this ice blue colour on her!  In love!!


Janine Robertson
Janine also had a last minute run at the deadline and did really well to get it finished, as her capelet is lined as well.  She did make a small boo-boo, but we aren't going to talk about that here (10 points to anyone who can pick what it is).
 
In love with this colour too!

Joanna Hehn
Joanna picked some lovely fabric that really doesn't read well in this photo - its a brocade with a little floral paisley print in green, pink, and blue.  Great fit Joanna!


Kacy Burchfield
Kacy picked a fabulous pink and brown houndstooth print fabric, which was challenging to do bound buttonholes on, only because it made you cross-eyed!  Kacy also made a boo-boo, funnily enough the same one as Janine.  Have you picked it yet?


Katherine McRae
Contrary to the expression on her face, Katherine really loves her capelet!  What she wasn't loving at this time was wearing heels on wet grass, and the sun in her eyes.  She wore this outfit to church and got lots of compliments.  I'm not surprised either - how great does it look with more casual pants!


Naomi Brick
Naomi loves her capelet and is already planning a couple more.  This one came out a bit tight across the bust, but I think it is still very wearable!


Rachael Coutts
Rachael was the first finished!  And look at that happy face!  Its the result of someone who challenged themselves with their sewing and succeeded!  Rachael only started sewing THIS YEAR so all of you that think this project is too advanced for you - think again!


By the way Rachael - that building behind you is magnificent - what is it (besides a glasshouse)?


Tanith Kovari
Tanith is another one who challenged herself with this pattern, and I think the result is fabulous.  And that amazing fabric will go with just about anything!
 

Then there was me.  I made two capelets, one in gaberdine and one in velveteen.  I also made items to wear with my capelets.  A dress for the gaberdine capelet, and a skirt for the velveteen one.  Except there was a problem... the dress didn't fit.

It took me 24 hours to dust myself off from that - it really rocked my confidence in how I felt about myself, and how I thought I looked.  But dust myself off I did, and here are the results.

My gaberdine capelet:


And my velveteen capelet and skirt:


I love both outfits and I think they are going to be worn often as the weather here cools.

The lovely people at Decades of Style were so happy with the response to the sewalong that they have generously donated a US$50 voucher, so I had Stella help draw me a winner from the girls who participated.  I assigned numbers to the girls in the order that they submitted their photos.  This is the number Stella drew:


Its upside-down, but thats the number 3, and number 3 was:

JOANNA HEHN!!!

Congratulations Joanna!  Send me an email to collect your voucher.

Ladies, once again WELL DONE.  Each and every one of you did a magnificent job, thanks so much for participating!  And for those of you that weren't able to join in, I hope that seeing the finished products made by sewers with different experience levels makes you want to take out that pattern and have a go for yourself!

Beccie
xxx

Wednesday, April 1, 2015

Cinderella : The Ultimate Costume Porn

Ever since I saw the preview online for the recently released Cinderella movie, I knew I just HAD to see it!!!  And I wasn't even going to bother borrowing a child from someone as camouflage!

This movie was a visual feast from start to finish, and while everybody is raving about the blue gown that Cinderella wears to the ball (and with good reason - that thing is incredible!), the standout for me was just about everything Cate Blanchett wears as the evil stepmother.


From the minute she walked on screen (in the above outfit, actually), I was completely spellbound.  Her costumes were such an incredible mix of 1940s screen goddess and 1880s victorian that I just couldn't look away!  The costume designer for this movie (who is now my hero) is Sandy Powell, and she based the evil stepmother's look on 1940s icons like Marlene Dietrich and Joan Crawford, and then blended those elements with the 19th century look of the rest of the film.

If I could walk around like this every day I would be eternally happy.

Yes, that is a cat on a lead...

This chartreuse colour (which was very popular in the 40s) seems to be the characters signature colour, as most of her outfits features it.  Unless she's wearing leopard...


This is the only full length photo I can find of this outfit (sadly, cause its awful), and I let out an audible groan when it came on screen.  If I can find an appropriate fabric, keep an eye out for me sewing my tribute to this in the coming months.

The outfit she wears to the ball once again features the signature chartreuse colour, and an amazingly sculptural collar reminiscent of the architectural quality of Charles James.


My other favourite characters to watch were the evil step-sisters.  I loved the way that they always had matching outfits, just in different colourways.  And as much as their mother was 1940s, the girls were 1950s with accents on their outfits like peter pan collars, and little cropped sweaters and knitted boleros.


But just like everyone else I was completely spellbound by Cinderella's gown as she attended the ball. 


I completely stopped listening to the dialogue, and could pay attention to little else than the skirt every time she was on screen.  The way it floated was incredible, and every time it flicked around I tried to get a decent look at what was going on underneath!

Look at it float!

I've done a bit of reading since, and the foundation for the skirt was a crinoline cage - something like this:


Then their was a couple of petticoats loaded with frills on the hem and on the inside (these are what you see when she dances).  The next layer was a "really cheap" iridescent pale white fabric, with five or six more incredibly light and floaty layers over the top of that, in colours like silver, lilac, lavender and blue, which all mix together to form that iconic colour.


There has apparently been a fair bit of controversy on social media about the size of Cinderella's waist and how it must have been digitally altered.  Clearly these people have never seen the effects that a well fitted corset and a massive skirt has on how a waist looks!

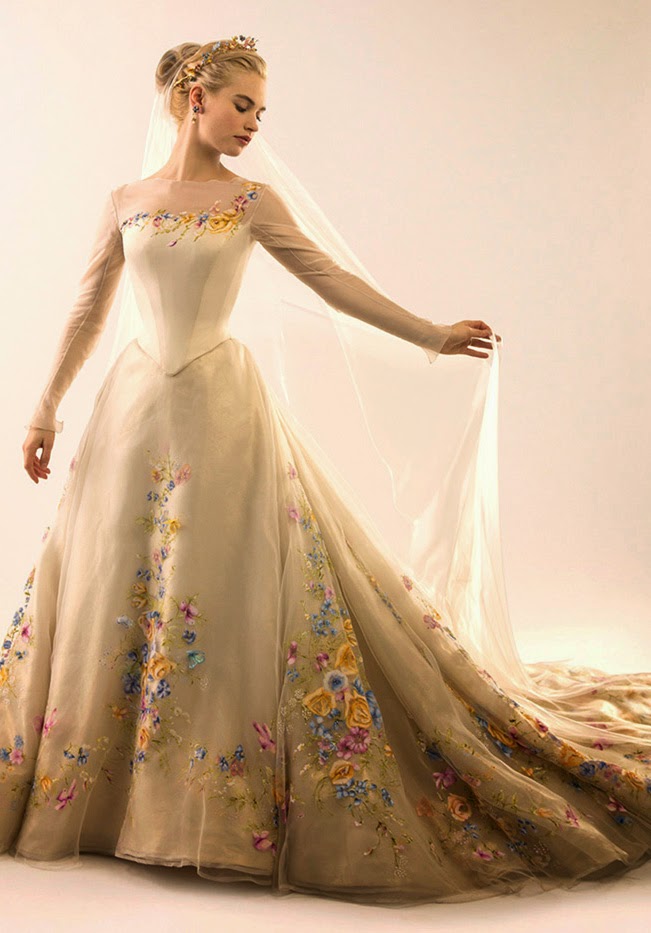
The other epically amazing gown that Cinderella gets to wear is her wedding gown.  It took 16 people 550 hours to make, and its on screen for less than 30 seconds I'd reckon.  Oh, and all those flowers were HAND PAINTED after the gown was constructed.


If you haven't already seen it, do yourself a favour and get to a cinema.  I guarantee you won't be disappointed!

Beccie
xxx


Friday, March 20, 2015

Capelet Sewalong : Part 7 : Putting the Elements Together - and GIVEAWAY!!!

Wow - we are on the home straight now!  In this post we will attach the cape to the bodice, finish all the edges, and attach the buttons.  Lets get started.

If you don't have the circles showing where to attach the cape marked on your bodice, mark them now.


This is the line where we will attach the cape.  But before we can do that, we need to prepare it.  Remember that portion of the front of the cape where we stitched a line on the seam line rather than within it?  Well, we are going to use that stitch line as a guide to iron the flap under.


I'm using plenty of steam to maintain the slight curve.  There is also one more thing we need to mark - the space that becomes a button hole.  Rather than marking it with chalk, I am going to use pins.  Remember that this is a guide to where the button hole should go, not the size of the button hole.  If you can't remember how wide to make the gap, measure one of the bound button-holes you made earlier.  (I sure can't remember!!!)


Also, remember that if you need to increase the size, you need to make sure the button-hole itself is still centred in the same spot.   My buttonhole needs to be 1.5" rather than 1", so I have added half an inch to either side.  Transfer your marks to the lining side of the cape.


Now to stitch the cape on!

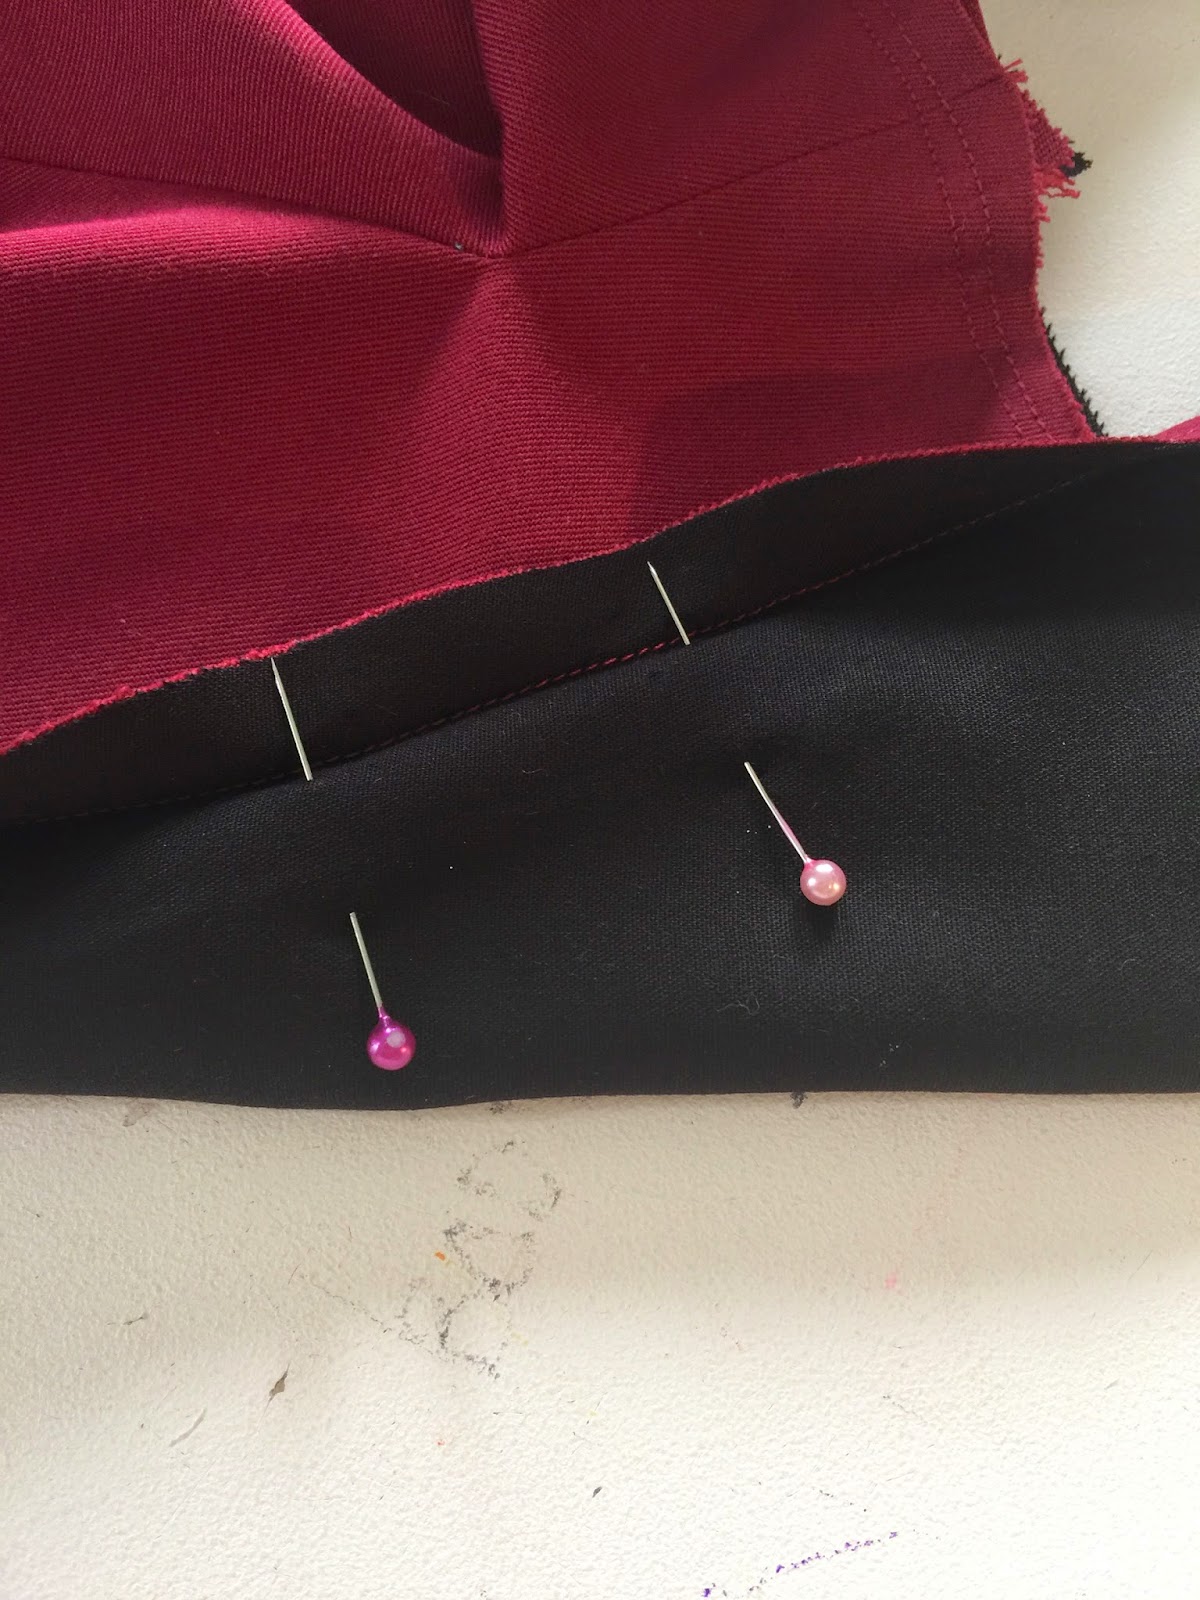
With the right side of the bodice up, and the right side of the cape down, line the pressed edge that you did earlier with the marks you made on the bodice.  Fold the flap out and pin the cape on.


The final mark on the bodice should line up with the end of your fold line.

Make sure that when you are pinning the cape on, the lining is nice and neat underneath, and the attached facing is out of the way.  Oh, and the line of stitching is going to be visible on your bodice lining, so maybe change the bobbin thread to a matching colour - thats what I'm doing anyway.

By the way - have fun man-handling this through your sewing machine...


Use the line of stitches you made on the capelet as a guide of where to sew - but sew just to the left of it so the line of stitches don't show when you turn it the right way up.   And don't forget to leave the space for the button hole!!!

Phew!  That was some stressful sewing!  How did you go?

Next job is to do the collar facing.  Take the collar facing pieces (called neck pieces), and sew the fronts to the back, clip the corners and press.  Make sure to mark the button-hole we need to leave open onto the front piece.


So that we have a finished edge when we turn it right way out - put some bias tape along the bottom edge.  Leave plenty of excess bias overhanging the edges.  It will help you later.


Pin the facing onto the neck/collar area of the capelet.  When pinning it on, you will be pinning along the top edge of the attached facing, then along the top edge of cape collar, then back along to the top edge of the opposite attached facing.

At the point where the attached facing becomes the front collar we will be pivoting around a corner.  That pivot point needs to be as close as possible to the seam line where the cape is attached to the point of the bodice.  I have marked that point with a chalk mark, and have pinned the facing accordingly.


(You will notice at this point that I am swapping to my other capelet.  Thats because I made a bit of a boo boo, and constructed the capelet the hard way.  I want to show you the easy way, not the hard way, so I've switched to my other one.  Oops).

Take a deep breath and sew the facing on (remembering to leave the button-hole open).  Clip corners and thick seams, and turn through.


Pin the facing down around the back of the neck, and now lets deal with the facings down the front.  We are simply going to put bias on the edge of the facing so we can hand sew it to the lining later.


To finish the bottom of the facing, press the bodice front up, then lay the facing over the top and match up the bottom to the fold line.


Well thats the last thing you need to sew with the machine - now its time to hand sew.  All the facings need to be sewn down, you need to hand sew the bound button-hole windows down, and sew the buttons on...

AND THEN YOU'RE FINISHED!!!!!


When I have finished all the extra hand sewing I gave myself on the gaberdine capelet, I will update this post with photos of it too.

I'm kinda thinking that about now you are wondering about the GIVEAWAY portion of this post - well, if you send me a photo of your finished capelet before midnight on Monday the 6th of April (yes, you have all Easter to sew if you want to), you will go into the draw for a

$50 DECADES OF STYLE VOUCHER!!!!!

I will announce the winner when I post the round-up showing photos of all of us wearing our glamorous creations.  So get sewing ladies!!!

Beccie
xxx

Tuesday, March 17, 2015

Capelet Sewalong : Part 6 : Cape Construction

We are almost there!!!  This post won't be as long as the last one, but you will recognise many of the things we did in the last post being done in this one.  First up we have one more tiny little chore to do.  We need to make some hair canvas pieces for the collar.  It will give the collar shape and help it stand up.

First step is to approximate pattern pieces from the cape pattern pieces.


You can see that I have drawn yellow lines on my pattern pieces.  This is where I'm approximating the base of the collar is, and where the hair canvas should finish.  Cut the hair canvas, and trim it down 5/8" on the sides where there will be seams, just like we did earlier.


Then we need to sew bias onto it like we did earlier.

(yes, that is different fabric.  I forgot to take a photo of my gaberdine cape when it was at this stage)

Now we can sew it to our cape pieces like we did with our bodice pieces.  Remember to keep your line of stitching in the seam allowance so it won't be visible in the finished garment.

Pin the cape fronts to the cape back along the side seams, and sew.


Then clip the corner where the collar turns into the shoulder and press the seams.


There is one more thing we need to do to the fashion fabric side of the cape - as suggested by Janet at Decades of Style.  The corner where the cape stops being sewn to the bodice and starts hanging free can have quite a bit of stress on it, so we need to reinforce it

Grab some iron on interfacing, and take out one of those tiny scraps that you were sure you would use at some point (hint: the time is now!) and cut two circles about 1.5" or so in diametre.  Then mark the clip line from the pattern onto the fabric.


Iron the interfacing circle on to the fabric so that the centre of the circle is over the end of the clip mark.  You will then need to remark the clip mark.


Ok, so thats the outside part of the cape together.  Lets do the lining.  Pin the fronts to the back just as you did before, sew the seams and clip the corner.  Then take the facing pieces you made for the cape and sew them together, like we did for the facing pieces for the bodice.


And, as we did for the bodice, sew your bias to the right side of the facing piece, at the top.


Then pin it on to the right side of the cape lining, at the hem.


And sew it to the cape lining, but make sure to do it within the seam allowance, so its not seen in the finished garment.  Then sew another line along the bias tape - but do it neatly, because this line of stitches WILL be seen in the finished garment.


Now we need to pin the lining piece to the outer cape piece.  Put them right sides together, and pin from the interfacing circle, down the side, across the bottom of the cape, and back up to the other interfacing circle.


Our line of stitching needs to start on the end of the clip line, and run around and finish on the end of the other clip line.  Make sure you pivot in the corners.

Clip the clip lines, curves and corners, then turn through so the right sides are out.  Press.


One more thing and the cape construction is finished!  Pin the lining to the cape the rest of the way around the edge.  We are going to sew around that edge to secure the lining to the exterior.  In all other cases when we have done this before, we have sewn within the seam allowance.  We aren't going to do that this time.

The front edges of the cape - from the clip line up to the point of the collar - will be sewn right on the seam line.  The remainder (around the collar) will be sewn within the seam allowance.


Right!  Thats it!!  The cape is made!!!  Guess what that means - the next post will be putting them both together and we will be finished!!!

Beccie
xxx