Tuesday, October 30, 2012

Melbourne Cup Dress : Its finished!!

Well I had a fabulous weekend in my sewing room!  And so productive - I got my dress for Melbourne Cup finished!!

I started with the skirt, cause that was the bit I was most worried about.  I frenched all the seams because I can, and I ended up with this:

Yay! Ponies!!

Then I got on with the bodice.  I traced the pattern I fiddled around and did a Full Bust Adjustment on so I could fiddle with it again.  It had a scooped neckline and I wanted a V neck.  It took a bit of adjustment to get it right because my first V neck cut was a bit mumsy... and thats not quite what I was going for!

I then hemmed the skirt piece and stitched the two together, and pinned it to my headless helper so I could revel in the achievement!

Yay!  A Dress!!

It was still open at the back at this point, so I sewed the back together with a centred zipper in the top, and a split in the bottom so I can walk (very important!), and I ended up with THIS!!!

Now, you will have to forgive the bad hair and no makeup - I was really just trying it on to see if it fit...

The front - see the non-mumsy neckline

 The back - I like the shape
Its a shame that one pony's nose is missing, but there wasn't much I could do...

So what do you think?  I'm pretty happy with it, and when I get all the accessories on (like the magnificent fascinator that should arrive tomorrow) and the proper hair and makeup etc I think I'll look pretty cute!

Beccie
xxx


Friday, October 26, 2012

Melbourne Cup Dress : A Change of Direction

So I had to throw all my dressmaking plans out for this dress and go back to the drawing board.  Sigh!  This is due to the fact that I've put on around 5kg (10 pounds) since I've been unwell - too much comfort food!  I no longer have enough of the horsey fabric to get around my now curvier curves...  Thankfully I hadn't started cutting ANYTHING out, so I was able to rethink from scratch.

 
Its going to be a bit more of a challenge now...

So I started thinking about my options, and realised I could make a skirt with panels... and I remembered this skirt:


Right!  So the skirt bit was sorted - but what about the top?  I made the pattern for the skirt from my Marilyn dress but I didn't want the top like that - cause this is for the day time, not the night time...

I had recently done a Full Bust Adjustment on this pattern to give me a bit more room, and I thought that this, with a V neck instead of a scooped neck, would give me the look I was after:


Gee I wish I was still this size.... 

So - the dress will have an empire line, with the blouse ending under the bust, and the skirt with the shaped seam lines will continue from there to just under my knees.  I'm pretty happy with this design, and I'll have enough fabric to make it happen!  Hooray!!

Also, my shoes arrived - and they are a FABULOUS match!

 
I also got a beige/sand coloured clutch bag

And Bobbie, from Madly Hatted Millinery, who I commissioned to make my fascinator, has made a start, collecting these bits:

 
See the little scrap of fence I sent her to get colour matches from

Now that I'm feeling much better I'm pretty sure I'll have the dress all but done this weekend, so you can all excitedly look forward to next weeks post where I will show you the Melbourne Cup Horsey Dress!!!

Thanks for your patience over the past few weeks.

Beccie
xxx

Friday, October 19, 2012

Its almost Melbourne Cup time!

Sorry for my absence just recently - I haven't been well.  And while I'm not fully better, I have a dress to sew for Melbourne Cup Day and I need to get on with it!

First up, a bit of information about Melbourne Cup day for those of you who aren't Aussies.

Melbourne Cup is a horse race that takes place in Melbourne, Australia on the first Tuesday of November, and has done since 1861.  Its known as the 'race that stops a nation' because that is quite literally what happens.  Everyone is glued to the TV (if they can get to one) or the radio if thats the best they can do, for a few minutes at 3pm to see if the horse they backed, or the horse they drew in the office sweep, comes in first place.


Its also a huge day in fashions on the field.  Beautiful dresses, amazing hats, shoes, bags... sigh!


Pretty much every restaurant and club worth its salt has a Melbourne Cup function where you can get dressed up and enjoy a long boozy lunch, a fashion parade or two, and watch the race.  But I always try and go somewhere where horses are running, so always end up at a race track somewhere with a whole bunch of friends, and we party on into the night.  One day I'd like to actually go to Melbourne for the Cup...

But there is a downside - and it involves a warm day, sunshine, too little food, and too much alcohol

Being a lady, I have rules about this sort of thing...

Its almost the start of the party season in Australia, and its often said that white collar businesses start winding down after Melbourne Cup day, and don't fully get their acts together again until after Australia Day (26th of January).

Right!  That brings me to my outfit.  This year I decided to make something instead of buying it, and of course its going to be over-the-top.  But given that I haven't been well and I'm running out of time, I've had to put the shirtwaister dress to one side to make sure I get this project done.

If you follow my facebook page you may well have seen me post a picture of a piece of fabric.  I was trying to work out if everybody thought my idea was a good one, or if it was just too over-the-top.  The fabric was this fabulous border print with ponies on it!!!

Isn't it fabulous!
Please excuse its wrinkles - I prewashed it and haven't ironed it yet...

The response was overwhelmingly positive, so I bought it!  Now, I would love to have made a beautiful full skirt from this fabric, there just isn't enough of it - boo!  So I'm making a wiggle dress instead.  Today I went out to get fabric for the bodice of the dress, and while I was there I found a great pattern to use.

I couldn't get an exact match for the bodice, so I went with one a few shades darker

I'm going for the sleeveless version (bottom right)

I know its not a vintage pattern, but its a classic waisted wiggle dress shape.  And I was able to buy my size, and this pattern comes with different pattern pieces for different cup sizes, so I eliminated a lot of work straight up.

So now I'm excited to get started - but I need a lie down first...

Beccie
xxx


Friday, October 5, 2012

Apologies!

Sorry all, I have been unwell since last weekend, and have done very little sewing - very little of anything actually!

So I thought I would suggest some other bloggers you can read instead of reading my blog.

Gertie from Gertie's New Blog for Better Sewing is getting through her coat sew along - they are up to marking their cut pieces.  I was going to join this sew along but then it got hot here, and the last thing I want to do is sew a coat!  Check out their progress here.

Peter over at Male Pattern Boldness (one of my favourite blogs) has a chat about his love for vintage glamour and where he think it came from.  Read it, and the comments from his readers (which are always enlightening) here.

Laura Mae, who writes Lilacs & Lace is making a ballgown and she has made the embellishments before the dress...???  Find out why here.

Fleur at Diary of a Vintage Girl talks colour and having your colours done here.

And lastly, Bunny who writes The Musings and Adventures of a Pinup Mama, talks about her love of Broadway.  She really is an inspirational blogger!  Read her blog here.

Thanks everyone - I'll try to be back to my usual self next week.

Beccie
xxx

Thursday, September 27, 2012

A golfy polo shirt becomes....

.... a slightly smaller better fitting golfy polo shirt!!!

So, most of you don't know that I play golf.  Not a lot, but a bit, and not extraordinarily well.  Just enough to get me around without embarrassing myself!  One day I will make myself a pinup appropriate golfing outfit like this one:

In fact I have the patterns and the fabric, I just haven't gotten around to doing it...

Anyway!  Until that day I keep getting given shirts like this one when I play in corporate days:


Now what shapely young woman like myself would want to wear something like this?  Not me!

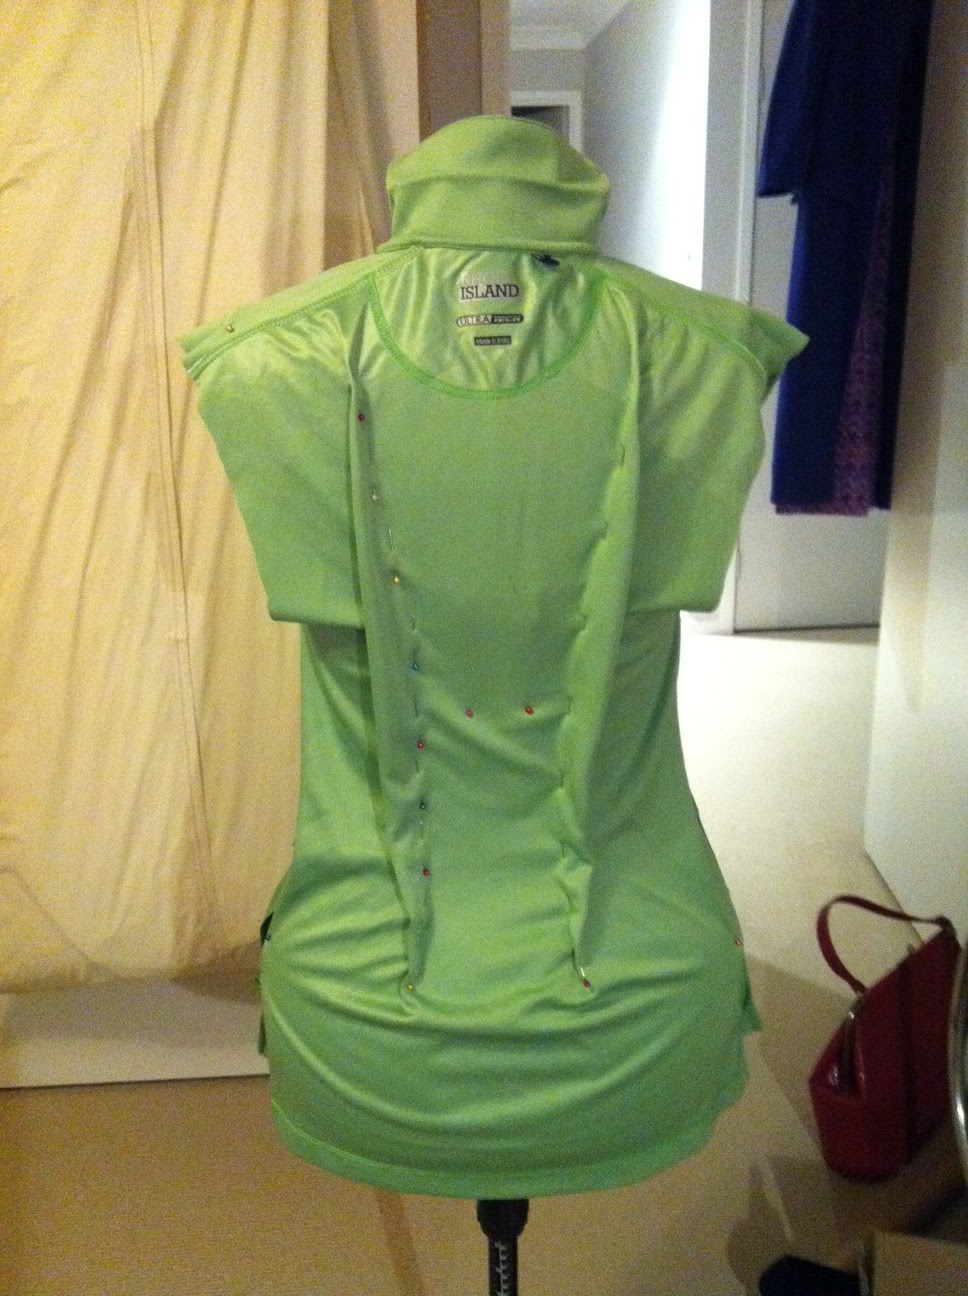
So, in the spirit of adventure, I decided to pull it apart and remake it in a way that would fit my curves.  I started by cutting out the sleeves and down the side seams.  I wanted to leave the shoulder seams and collar etc intact because there was NO WAY I wanted to attempt to put that bit back together.

Then I put it on my headless helper and made some darts:


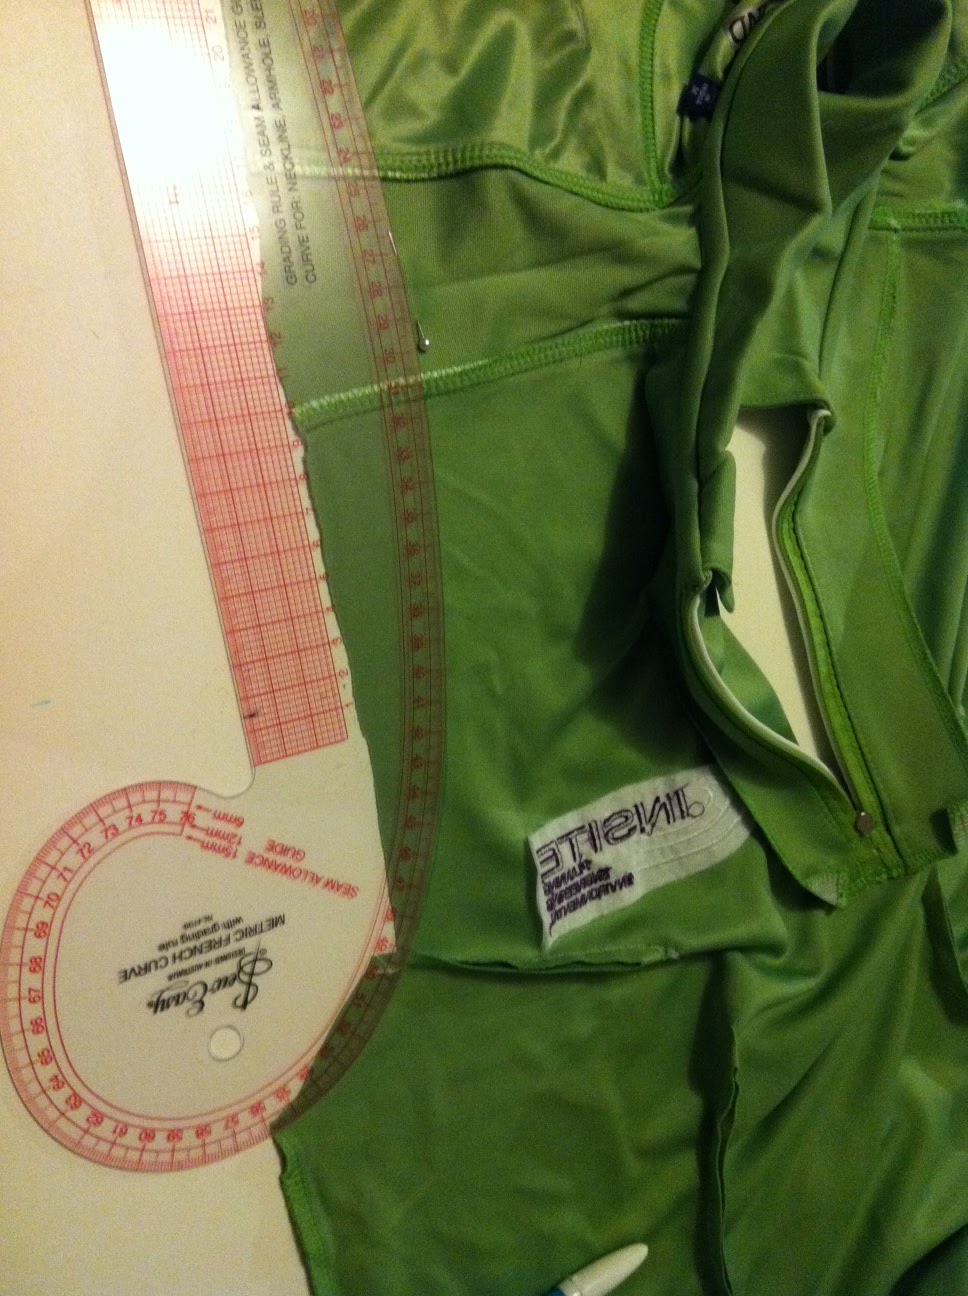
And while I was at it, I marked where the point of the shoulder was, cause I didn't want a fitted polo shirt with saggy sleeves!

Then I sewed up the new darts, and re-drew the arm holes using the new shoulder point:


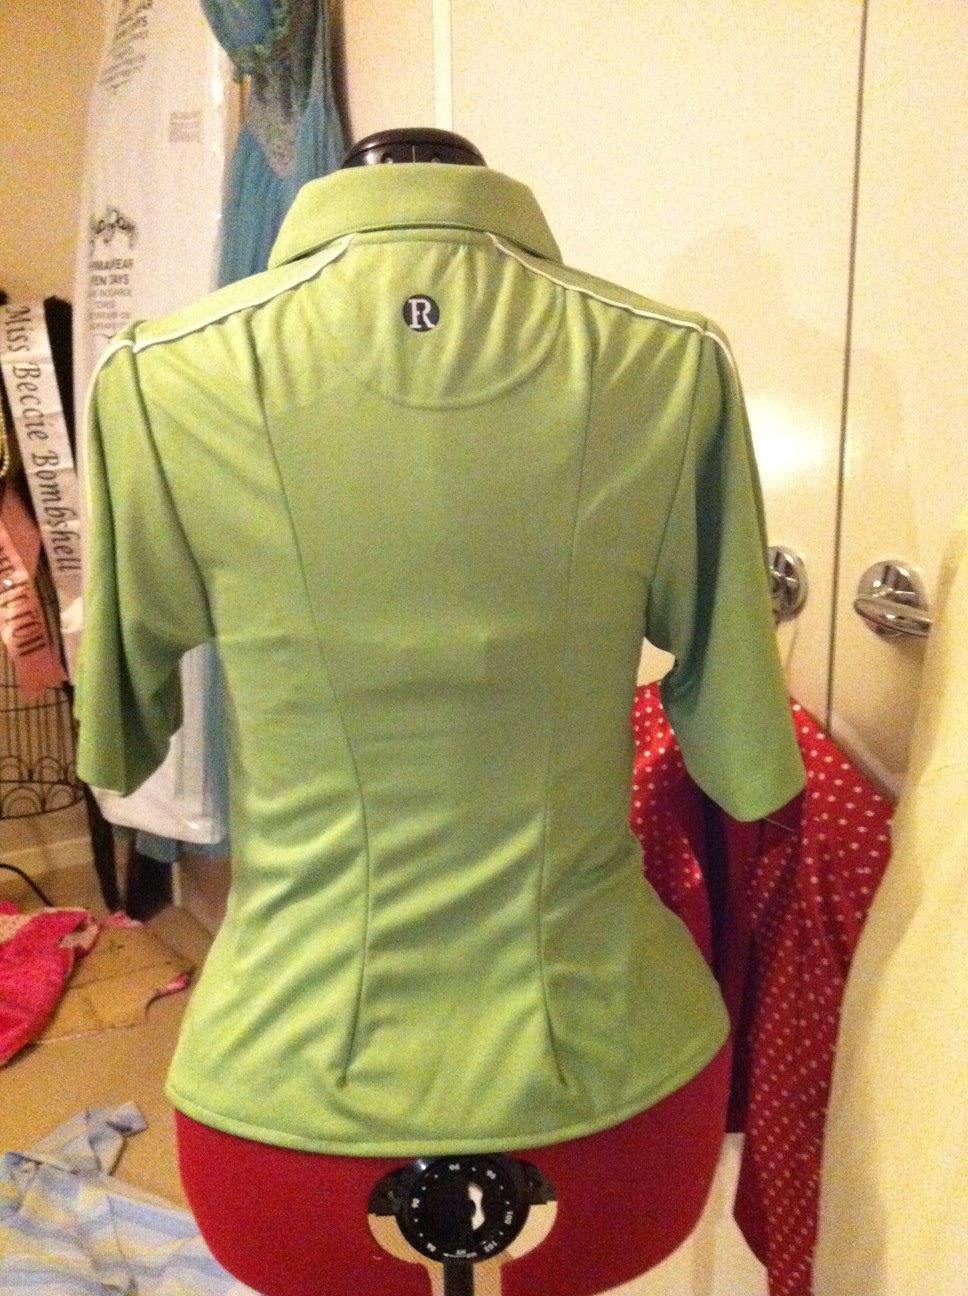
Then I sewed the sleeves back in, trying really really hard to match the white piping on the shoulder:


And then I chopped about 3 inches off the length, and made a new hem.  And the new polo shirt looks like this:


Much better!!!

Stay tuned tomorrow to my facebook page, where I will be posting a photo of me wearing my new, now fitted shirt, out on the golf course.  Fingers crossed my team wins!

Now, on a different note, I cut out the pieces for my shirtwaister on the weekend, and all the thinking about the way to lay the stripes got me thinking about the button holes... how was I going to work the stripes with the bound button holes?

The stripes on the bodice and the skirt run vertically, and the stripes on the collar and sleeve cuffs run horizontally.  I didn't really want to do horizontal stripes on the button holes cause one lip will be one colour and one will be another colour, which could look weird.  I thought I might be able to do vertical stripes like the bodice, but have them a different colour to the stripes on the bodice.  But then I thought why not do them diagonally?  So I made a test one:

Looks pretty cool, huh!

So the other thing I noticed when I did this test, was that I'm going to need to line my fabric with something.  This fabric is very light, and therefore a bit sheer.  So it needs something equally as light so it has a similar drape but isn't so sheer.  Thankfully I think I have just enough of a lightweight white cotton sheeting to do the trick!

Looks good with the button anyway!


Wish me luck tomorrow!!!

Beccie
xxx


Thursday, September 20, 2012

Putting it into practice

Full Bust Adjustments are my new best friend!  And what better way to celebrate our new friendship than by using the skill to sew a new dress!!

Some time ago I found this gorgeous fabric on the chuck out table of my favourite fabric store for $4 a metre!!!  Bargain!!!:

Its a lovely light cotton, and the stripes are about 1 inch

I just knew when I saw it that it would make a fabulous shirtwaister dress, so on my next trip to Sydney I stopped by my favourite button store All Buttons Great and Small and bought these beauties:

Every time I go to Sydney I make sure I take a swatch of fabric with me,
just in case I have the time to spare to go to this store.

And then I looked through my (growing) pattern collection and found this divine creation:

Perfect!

As an aside - I just love vintage mail order patterns when they come in their original envelopes.  Look at the envelope that this one came in:


I just love the history!  You can see that this lovely pattern was posted to Mrs Gordon P Folkins in Kings County, New Brunswick, Canada, from Toronto, on the 9th of February 1955.  And now its made its way across the world to little ol'me in Australia :)  I wonder what Mrs Folkins would think of that?  I wonder what her first name was?

Anyway!

I traced the bodice front pattern piece onto calico and did a Full Bust Adjustment.  I then pinned it onto my headless helper and re-did the vertical dart.

Yep, you've now seen my underwear...

Then I grabbed some (totally ugly) fabric out of my stash and made up a mock bodice.  I've yet to try it on but it looks pretty good on my headless helper!

I didn't make the sleeve cuffs, I just folded back the sleeves so you get the idea

Yep, I ran out of ugly fabric, but at least this way you can see the cool triangular back yoke!  And I also really like the gathering of the bodice back at the yoke and the waist.

By the look of it I'll be cutting the sleeves down before I sew the cuffs on - I like the length they are like this, so thats a bit over an inch shorter than they would be if I left them as is.

Looks pretty good huh!  And will fit SOOOO much better now that I've done the FBA.

Now to play with the stripy fabric so I can get some cool effects!  I'm thinking vertical stripes on the bodice and the skirt, and then horizontal stripes on the collar and the back yoke.  Not sure which way to go with the belt yet...  diagonal or vertical?

Any suggestions?

Beccie
xxx

Tuesday, September 18, 2012

Pinboards, Sunshine and FBAs

Well it was an odd weekend - plenty of time to sew, but a lack of enthusiasm to get in front of the sewing machine.  Sigh!  Does anyone else have weekends like that?

The weather was BEAUTIFUL and warm, and the last thing I felt like sewing was a housecoat... that may have to go back into the cupboard until the weather starts to cool down again sometime next year...

So I did something I've been threatening to do for a long time - I finally got a pin board and organised my fabric stash!


I set up on the floor of the lounge room in the sun with my fabric stash, a tape measure, post-it notes, texta, scissors and pins.  Then I went about measuring all of my good fabrics - I didn't worry about linings, or plain cottons, or anything I'd previously cut bits out of.  Then I cut a swatch of the fabric, wrote the length and a description on a post-it and pinned it to the board!  And I also wrote down what I intetend on doing with it at some point, so I now also have a plan of what I've got coming up... sort of.


And then serendipitously, my Dad arrived on some other errand, and was able to hang it on the wall for me - good ol'Dad!  What would I do without him.

So I'm hoping that this board will keep me focused and stop me adding to my fabric stash...  What do you think my chances are?

Doing this little project did increase my enthusiasm for sewing, but I had something else I wanted to do first - research Full Bust Adjustments.

'Whaaa' I hear you say.

Did you know that commercial patterns (including vintage ones) are designed specifically for women with B cup boobs???  I didn't either, but it sure explains why when the bust measurement on the pattern is the same as mine, the garment still doesn't seem to fit properly!  So some clever person at some point in time invented a Full Bust Adjustment (or FBA) for those ladies who's 'cup runneth over'.  There is also a Small Bust Adjustment... but I don't need to worry about that one, so I didn't read about it... sorry!

FBAs are covered briefly in Gertie's book, and she does a good job of quickly explaining how to do an adjustment - but I wanted to know more.


Now I'm not going to write a tutorial on this cause there are a lot of really good ones out there, but here is the basic idea:

  1. Make a copy of the front bodice piece on some tracing paper or something.  I like to use calico because it holds its shape really well and doesn't distort when you pull on it AND its fabric so you can sew it and pin it and put it on without worrying about tearing it.
  2. Pin the darts together (or sew it if you like unpicking things) and either hold it up on yourself or put it on your headless helper if you are lucky enough to have one.  Measure the distance between the centre front of the pattern, and the centre front of you (or your headless helper).  Remember this number!
  3. Un-pin the darts (or unpick if you sewed) and draw lines and cut as per Gertie's illustration.
  4. Spread pieces as shown in the illustration making the vertical gap in the centre of the piece the same width as the number you remembered earlier.  I did this bit on another piece of calico, so I then just pinned it down and cut it out again.
  5. Before you unpin your spread pieces you need to redraw the darts  The bust dart on the side will be deeper - but the vertical dart at the waist... from experimenting I found that redrawing the original dart wasn't enough for me, so I pinned it to my headless helper and made my own dart...  I couldn't find much written down about that bit.
So now I have a new skill which I am looking forward to perfecting with my next project!

And another note on headless helpers - the boob size on mine (and the other ones I've seen) all seem to be about a B cup - just like commercial patterns.  And increasing the size of the bust using the dials means you don't get a correct under bust measurement.  Nor does it have any kind of adjustment to create a little pot belly - and I don't have a washboard stomach...  There is a commercially available system to fix all this, and I almost bought one, until they quoted me $70 postage - which is almost as much as the product.  So I came up with my own idea...  I changed the underbust measurement on my helper to the same as mine, then put on of my bras on it and hey presto! it looks a lot more like me!  It will help you if you do the same thing with your headless helper BEFORE you use it to help you make your FBA.

Hmmm - now to look on my board to get inspiration as to what my next project might be!!!  Any suggestions?

Beccie
xxx