Friday, November 29, 2013

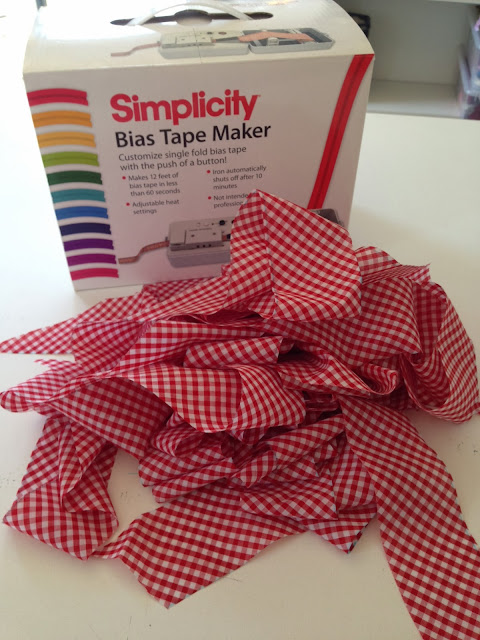
The Simplicity Bias Tape Maker

I was given one of these little gadgets for Christmas last year and its taken me almost a whole year to find the perfect project to make be break it out of the box.  The project, of course, is the Cherry Gingham Dress.


You may remember that when I was cutting out the dress I had a light bulb moment and also cut out a bunch of bias strips.  Well, yesterday I turned those strips into bias tape - and it was EASY and FUN!!!  I thought I'd share how easy it was with you just in case you want to put one of these little machines on your Christmas list.

Cut out the strips
I have no photos of me doing this bit - but I did have a photo in this post where I made piping.  All you need to do is cut out diagonal strips from your fabric, with the strips running at a 45 degree angle from selvedge to selvedge.  The strips need to be twice as wide as the tip you are using.  The machine comes with a 1" tip, so I cut my strips 2" wide.  Doing this on gingham was easy because of the checked pattern.

  
Sew the strips together end to end
Line the strips up so they make a right angled corner, and then sew diagonally across the corner.  The hardest thing about this step (on fabric that doesn't have an obvious right side) is making sure that all the seam allowances end up on the one side of the strip you are making.


Cut the corner
Cut the seam allowance down to 2/8ths of an inch or so on each join

I really need a new ironing board cover - this one is ugly...

Press the seam open
I think the hardest thing about this step is not burning your fingers...


Wrap the bias around the spindle
This bit was a bit of a brain strain.  You need to wrap it around the left hand end of the spindle with the fabric right side up in such a way that when you load it into the machine the fabric comes over the top of the spindle, not out of the bottom like it is in the photo.  Thankfully I worked out I was doing it wrong well before I got much wound on.  Depending on how much bias tape you are making, this can take a while.  I was making a fair bit, and my wrists were a bit sore by the time I'd finished winding, and the spool was so fat I had to take the grey foam out of the machine so it would sit in properly...


Put the spindle and the guide into the machine and poke the end of the tape through the tip
I used the 1" tip that came with the machine, mostly because I didn't want to buy a different tip if I didn't like the machine.  It was pretty easy to get the fabric through the tip.  I used my thumbnail in the slot to feed it through, but I'm sure you could use any number of things to do that if you don't have thumbnails.


Put the tape through the bit that irons it
That chunky cream coloured thing that the bias tape is running under in the photo lifts off really easily so you can pull enough tape through to have a few inches sticking out the other end.  This also gives you a bit of an opportunity to make sure everything is moving as it should.  One thing to double check is that the little stopper at the end of the rest (the tall thing next to the spool) is at the edge of the fabric to keep it in place.

Turn it on and wait for it to warm up
This took barely a minute, which gave me a minute to check the heat setting (there are lots of different options).  And when the light went green, I hit the run button!

 
Its making bias tape!
I'll admit it, I was pretty excited at this point.  The little motor started going and bias tape came out of the machine!!!  One thing to note is that I found it was a good idea to keep the tape coming out of the machine taut because it has a tendency to jam.  I found out because it happened when I was taking photos, but luckily I was able to clear the jam with the machine still running so I didn't ruin any of my tape.


And there you have it - SOOOOO EASY!!!  I wasn't sure I would like the 1" bias tape, because I usually use 1/2" bias tape...


But I've always liked the statement that a different coloured bias tape makes to a hem, so wider bias will make more of a statement I figure!  I pinned some on to the skirt so you can get an idea of what it will look like when its finished.  I'm so excited to sew it on now!!!


So I am totally in love with this little machine!  Do any of you have one?  Is anyone tempted to ask for one for Christmas?

Beccie
xxx

Wednesday, November 27, 2013

Guest Post : Top 5 Vintage Sewing Patterns

So recently I was contacted by Nick from Mela Mela Vintage (in the UK) about writing a guest post of their shop's top 5 vintage patterns.  Of course I said yes - I thought we'd all be curious to see what their favourite patterns were!!

But before we get to that - Mela Mela Vintage also sells clothes, accessories and jewellery.  I thought I might pick a couple of favourite things too!

I die that my waist is not 26 inches...

This is tiny, but I'd stop eating for 6 months if I thought that would help me fit into it!

Its also teenie tiny...

I could spend hours trawling their website looking at goodies, but I probably should get on with loading this blog post!  So, without further ramblings from me, here is Nick's Top 5 Vintage Sewing Patterns!

Top 5 Vintage Sewing Patterns

If you want to be a truly authentic vintage bell, then you really have to stitch your own clothes.  Dress making is not just a really fulfilling hobby, but it also means you can create inspired bespoke outfits that will turn heads.  Buying vintage fabric can be expensive, and many fabrics are faded or a little worse for wear.  You're better off buying a vintage look fabric and stitching it up into a lovely vintage outfit.  You can still buy original patterns from bygone eras, which not only can be used to create your own fabulous creations but also come in beautiful retro-look sleeves.  Why not frame the pattern sleeve and knock up a few different vintage dresses?  Once you find a style that you love and that flatters your body shape, you can sew it in a variety of fabrics, alter the skirt lengths and fit and add different buttons and adornments.  Here are five fabulous vintage patterns that you can really get your teeth into:

1. Vintage Pattern by Simplicity - Cocktail Dress

 You can find this pattern here

This is a beautifully flattering pattern, with its empire line and light gathers at the bust.  The darts at the waist will streamline any figure and the to-the-knee length looks demure and sophisticated.  It's ideal for recreating a little black dress, if you feel a little Audrey Hepburn moment coming on.  The optional capped sleeves or three-quarter length sleeves add a whole different dimension, meaning it could be used as a day dress in cotton or poplin or a classy evening dress in duchess satin or silk.

2. Vintage Pattern by McCall's - Dress with Slim of Full Skirt

You can find this pattern here

This pattern is deliciously versatile, offering such a different silhouette by simply altering the skirt.  The belted, gathered waist on both versions of the dress make it very flattering.  It offers a lovely feminine silhouette that simply screams vintage.  The fuller skirt would make a lovely day dress for days out or even weddings and family parties.  The slim skirt would look beautiful in tweed or a woolen fabric and is ideal for the Autumn/Winter months ahead.  The slim skirt would make ideal work wear.  Both styles are unique and memorable.

3. Vintage Pattern by Simplicity - Suit and Blouse

You can find this pattern here

Finding the perfect vintage ladies suit is a challenge indeed, and the simplest solution is to make your own.  This beautiful 60s suit makes wonderful work wear with personality.  Adjust the sleeve length, add buttons or go without or opt for a fitted blouse rather than a jacket, there is plenty of scope for variety.  The lovely scalloped edge of the top and the turtle neck collar are unusual elements that will make you stand out from the crowd.

4. Vintage Pattern by Knip - Dress and Blouse

You can find this pattern here

This lovely shirt dress is delightfully floaty and feminine with its delicate gathers, tailored sleeves and lovely diaphanous bow detail.  This dress needs to be made in a fabric that has plenty of movement such as chiffon, mesh or silk.  Add a belt to emphasise the waist, or wear with the blouse for a totally different look.  This is the type of dress that you will want in every colour, for every occasion.

5. Vintage Pattern by Butterick - One or Two Piece Dress

You can find this pattern here

This fabulous pattern is very unusual and is ideal for those whose love of vintage stems from them wanting to wear something that no-one else is.  Whether you opt for a looser fitting garment with prominent pockets and long sleeves, or a more elegant fitted sleeveless top which features the collar and bow and is worn with a fitted skirt; there is no doubt that this will soon become one of your favourite outfits.  Because this style looks so good when a little loose and relaxed, it is the ideal choice for those who are a little self-concious about their bodies.  The styling will hide a multitude of sins.  This is a very simple pattern to sew and so is ideal for beginners or less advanced seamstresses.

So why not dust off your sewing machine, break out the tailor's chalk and sew up a storm?  There is little more fulfilling than the gentle swell of pride you get when asked where you got your dress from, and can answer that you made it yourself.

This article was written by Nick Williams at Mela Mela Vintage, a boutique in Teddington; Greater London.  At Mela Mela Vintage you will find original vintage dresses and a huge selection of vintage wedding dresses.

Beccie here... lets leave this post with a look at one of those gorgeous vintage wedding dresses...


This bias-cut 1930s gown would have to be my favourite... I know the colour is a little unusual for a wedding gown, but oh my goodness isn't it gorgeous!

Thanks very much to Nick for writing this piece.  There will be updates on the Cherry Gingham Dress and an amazing customer commission coming up soon.

Beccie
xxx

Thursday, November 21, 2013

A Pretty Party Dress for a Wedding

So whilst I was buying a zipper for the Cherry Gingham Dress I remembered that I had a wedding to go to on the following Friday.  I know, it sounds like I wasn't too worried about this wedding (the first thing we think of when we get the invitation is what we're going to wear, right ladies!), but in reality we were given two weeks notice that the wedding was on.  A bit unconventional, but that's Kevin and AJ!  Last I knew they were planning a wedding in November 2014!!

Anyway, I had some lovely party fabric that I purchased whilst on holiday in LA.  It is the palest blue, and is embroidered with flowers and leaves with beads and sequins, and both selvedges are scalloped and embroidered.  I'd always imagined making a vintage inspired party dress with it, so I figured what better time to make the dress than now.


To make the bodice I thought I would use this McCall pattern that I used a lot last year.  I had already made some adjustments so I knew that it fit well.  I set about cutting out the three layers: the embroidered chiffon, some blue satin, and some blue cotton.  I sewed the pieces together and put them on my headless helper to check the fit.


It looked pretty good to me so I got on with the skirt.

To make up the skirt I used 3 metres of fabric like I always do, but this time I had three layers - one of the pretty embroidered chiffon, and two of blue satin.  I probably could have used just one satin layer, but I liked the thought of two for extra pouf!  I hemmed the two satin layers and trimmed everything to approximately the same size on the floor of the lounge room.  Then I pinned the layers together and thought about my options....

 I decided to make a gathered skirt, so put in two lines of gathering stitch and started gathering.


It was not easy.  And when I had gathered up about a third of the skirt I realised it wasn't going to gather up enough to work.  Sigh!  So I undid it and decided to pleat instead.


I picked up this small metal ruler at a corporate lunch with the express purpose of using it to help me make pleats, and can I say what a brilliant idea!  It really sped up the process!!

Once I had all the pleats done I pinned the bodice to the skirt and adjusted the pleats until it all fitted perfectly, then I sewed them together and pinned it back on my headless helper.


Then came the bit I was most worried about - putting in the zip.  Normally zips don't scare me.  but this one did, mainly because of all the layers I was going to have to be sewing through.  I decided that the best thing to do would be to hand pick the zipper, which I have never done before.  And can I say it was EASY and I actually ENJOYED IT!  Yes, that's right, the person who doesn't much like hand sewing, actually enjoyed hand sewing in a zipper.

While I was at it I also sewed some bias around the inside waist seam.  Stella helped!


Then I tried the dress on, and discovered I had a bit of an issue.  When I drafted the bodice pattern, I hadn't marked my waistline very well, and subsequently, the dress was too short in the waist.  BUT I had always been planning on adding a waist sash anyway, so no problems!

I took out some of the satin that I had used to line the dress with and made a sash that was a couple of inches wide and hand stitched it to the waist seam so that it would sit below the waist.  Here is the back:


But then something occurred to me - the bow is at the back, how am I going to tie it so it looks this good?  There was a bit of talk about it on Facebook and it was decided that I could spin the dress around, tie the bow, and spin it back to where it should be... and thats what I did!

So it was finished the morning of the wedding - JUST in time!  It was much admired, and I was very comfortable wearing it.  And finally, here is a photo of me and my husband at the registry office where the couple decided to get married:

 
I must apologise and say that I didn't get any photos of the back - I was just having too much fun!

So that's the emergency party dress.  Hopefully I'll be more prepared next time, cause these last minute projects can really be quite stressful!

Beccie
xxx

Monday, November 18, 2013

The Cherry Gingham Dress

Some of you will be thinking 'its about time she got around to this one' and I agree - it is!  I decided the weekend before last that I'd really like to do something for myself and this one was just begging to be made.


I measured the bust and the waist on the paper pattern and it looked like it would fit so I set about cutting out the pattern pieces.  I'm making view 2 on the right with the exposed buttons, but of course I'm making changes!

Because of the way I like my clothes fitted (ie tight), buttons tend to look strained, so instead of using the button front, I'm putting a zipper in the left side seam and sewing up the fronts so it looks like the buttons are functional, but aren't.  Its a win win!

One thing I was super happy about was that this pattern has NO DARTS!  Instead, there are gathers at the waist and the shoulders.  Oh, and there are bound button holes, which of course I chose to do in gingham.


These are the ones on the skirt - more on that later - and I was super happy to find perfectly matched buttons in dark red.  Not in my stash unfortunately, in the shop.  Why is it that there are never the buttons I want in my stash???

Anyway!

The bodice went together easily, even though it seemed to take a long time.  I think that's because I hadn't sewn this one before, and gathers take longer than darts, and bound button holes take a while too...


I really like the detail of the gathers at the shoulder, or maybe its the fabric combination that really makes it stand out, but I think it looks great!


Strangely, while there are facings for the fronts, there is no facings for the rest of the neckline.  So I grabbed a scrap of gingham and made a length of bias to finish it off.  Then I got an idea...


I cut lots more bias strips, and when the dress is together I'll use my Christmas present from last year (which I haven't used before) to make bias to finish the skirt hem!

But back to the construction.

Putting the skirt together was challenging.  Not because it was hard, but because I clearly wasn't thinking.  First step was making the bound button holes - which I made on THE WRONG SIDE of the fabric, so the back of the button hole was on the front of the skirt.  Sigh!  So I chucked that piece in the fabric pile and cut another.

Second time around I paid attention long enough to get the button holes in the right way, but stopped concentrating and put them in the left front, not the right front.  Of course I didn't notice this until I had the entire front of the skirt made.  I held it up against the bodice and noticed it went right over left, and the skirt went left over right.  SIGH!!!

Thankfully I had enough fabric to cut both fronts out AGAIN, but that was it - no more fabric, so no more  mistakes!  (I just want to point out that I've never made this many mistakes on the one thing!  This is so unusual for me!!)  So I put my super-concentration head on and paid attention and got it right.  So it really is true - THIRD TIME LUCKY!!!

I put the rest of the skirt together and attached it to the bodice.


Oh, and there is a pocket on the right hand side - in gingham of course!


But that is where I stopped.  I need to put in the zipper, sew up the front, attach the buttons, and hem the skirt and the sleeves with gingham bias (that I'm yet to make).  And the reason that I stopped is that I got super excited about an idea to make a dress for a wedding I attended last Friday evening.  If you've been following my Facebook page, you'll know exactly what it looks like.  For the rest of you, you'll find out later this week.

I hope you had a lovely weekend.

Beccie
xxx

Wednesday, November 13, 2013

What have you been up to ???

The short answer to that question is lots.  The long answer is this blog post!

I have been working on a few commission pieces for customers, which has been great.  Two of these pieces were needed for pinup competitions, so its been exciting to see my work on stage!

The first piece I made was a beach coat for Miss Polly Polka-dot who wanted it for the Miss Picture Perfect competition that was held on the 2nd of November.  This looks like it was a great competition and I hope they run it again next year.

All of Miss Polly's outfits must have polka-dots on them, so I went shopping and found some fabric that looked close to the colour of her vintage swimsuit and made her this beach coat:

I later made a tie belt in the polka-dot fabric

Now Miss Polly is a little slip of a thing, so the pattern that I used for this (the same one I used here) had to be shrunk a fair bit.  It was so different to be sewing something so small!!  But I was delighted with the outcome and so was Miss Polly.  Here she is wearing it on stage:

Isn't she just the cutest!
(Photos by Colin Davies)

I have another commission from Miss Polly that I am soooooo excited about - but I'm going to save that for another day....

The other pinup I was commissioned to sew stage wear for was Miss Dolly Bow Peep.  Miss Dolly had entered her first pinup comp, the Miss Sou'West Vintage Fest 2013 and needed a skirt to go over her playsuit.  After a lot of planning we decided on a red wrap skirt, so I made her this:

The fact that it wraps around and ties in a bow makes it easy to get off on stage

And here is a photo of her strutting her stuff:

(Photo by Red Leopard Photography)

Miss Dolly did so well considering it was her first comp - I was so proud of her!  There is a little video of her performance on her facebook page.  You can watch it here.

So, what else have I been doing???

Well one weekend I worked at the Sherbet Birdie studios for their Baby Animal day!


Yes.  We hired a petting zoo and had a photo shoot with all the baby bunnies, duckies, chickies, goaties, sheepies, and piggies.  It was seriously the best day on earth.  SO MUCH CUTENESS!!!!!  Even though I stank like a barn and was exhausted by the end of it, it was well worth it!  Check out Sherbet Birdie's facebook page for more cuteness as Sasha edits the pictures!

Hmmmm.... what else!

Oh!  Melbourne Cup Day!

I had planned to make an outfit for Melbourne Cup this year (like I did last year) but the vintage silk fabric with carousel horses I purchased went missing in the mail (sigh!) so that kind of put me off.  Instead I purchased all of this:

Jewellery: Lovisa

And even though I had a nasty migraine that day, I think I held myself together (mostly) to get through it!  And I felt pretty fab so that helped!

And last weekend I had great fun sewing something for myself, which I will show you on Friday... but anyone who follows my Facebook page will know exactly what I'm up to!

Beccie
xxx

Wednesday, November 6, 2013

I miss Frocktober!

So I thought I'd do one more post about it, have a look at what got the most likes, and give you a look inside my wardrobe (be prepared to be surprised!)

If you want to refresh yourself with all that I wore, you can visit my donation page here, where I uploaded a photo from each day (sometimes two!).

But now for the most popular outfits!

The most popular outfit on Instagram was this one:


This is the one I wore on Day 2 to a fashion exhibition, and while its an amazing vintage dress from the 1940s, I'm surprised it got the most likes (36!) when the next most likes was 30 (Days 4 and 8).

The most popular outfit on Facebook was this one:


No surprises there I suppose!  This outfit got 35 likes, with the next favourite one getting 25 likes (Day 18)

All up I wore 9 vintage dresses, 7 self sewn dresses, and 17 reproduction dresses.  Those amongst you good at maths will realise that this adds up 33!  That's because there were two days where I wore two outfits!

And in blogging about Frocktober I had a few questions asking how I store things, and saying that my wardrobe must be huge etc etc.  And while I wish my wardrobe looked like this:


In reality it looks like this:


Yep, all smooshed in to a too small cupboard, with my colourful plastic shoes on the floor.  Granted I do have another wardrobe space in my sewing room for my coats and vintage gowns.

They are smooshed in too, along with my petticoats and other random crap.

Much better treatment is reserved for my shoes and handbags, which are all nicely on display:

At least this way I remember what I have and don't buy duplicates
(don't laugh, I've done it before!) 

 Some of my more special or rarely worn shoes are kept in their boxes.

But, cutely, my husband let me keep ALLL the shoe boxes, in case we have to move... and I just put my handbags in front of them.

People also wondered how I stored my bangles and things... well, its not the prettiest, but I store them like this:

My bangles all live in this plastic container.  I'm working on a better way but haven't finished it quite yet... and least in the mean time they are easy to get to!

My hair accessories are in another plastic container

And my Lucy Luxxe pretties are in a glass candy jar.  Kind of fitting really!!!

So there you go!  Less glamorous that you thought I bet!

So in a final goodbye to Frocktober, I was also featured in today's local paper!

To read the article click HERE

In the last couple of weeks I have been doing some sewing - mostly commissions for others - but they have been fun, so I'm going to show them to you later in the week.

In closing, did you have a favourite outfit from Frocktober???

Beccie
xxx